I recently posted about using HiveOS to remotely manage your miner via their built in SSH shell. Thanks to u/SailsAk on Reddit for making a point that you can use a dedicated desktop or laptop to also remotely manage your miners for free with Google’s Remote Desktop.
That got me thinking, can I use a cheap Google Chromebook I have laying around to do this. Turns out, it is a big NO with Google’s own built in Remote Desktop, which I find ironic. So now what, do I buy cheap PC to do this, maybe find an old laptop on Ebay? As Kevin O’Leary (aka Mr. Wonderful) would say, “Stop the madness, there’s got to be a better way.” OK buddy, I’m going to find it…
$20 is what it takes, don’t believe me? Check the link out, they’re out there. What most folks don’t realize is that hidden inside those Chromebooks is actually a useful Linux based PC when you know how to unlock them. There are a few steps to follow in order to do it, and some of the newer Chromebooks allow you to go into “Developer Mode” and make life even easier, but I like a challenge.
Ubuntu Operating System
I chose to install Ubuntu on mine, it’s a simple version of Linux, has a good GUI, and supports the bare bones of what I needed; USB to ethernet port, RealVNC, and cheap. There are a few things you have to tweak, which will void any warranty, but if you spent only $20 then I wouldn’t worry about it.
I stumbled onto the FascinatingCaptain.com website and I have to say it was probably one of the single best, and easiest, walkthroughs I’ve ever done. I won’t bother going into all the details, he nailed it and I encourage you to check his site out, but will talk about the steps briefly.
Steps to Install Ubuntu
1. Backup data (I didn’t bother since I had nothing on it.)
2. Enter Developer Mode (by holding down ESC and Refresh while pressing power.)
3. Open the case and remove the metal sticker protecting write mode on the BIOS.
4. Install the modified BIOS (Available here.)
5. Download (on another computer) Ubuntu and burn the .iso to bootable USB drive (using something like BalenaEtcher.)
6. Boot into your live USB Ubuntu drive and do the standard install.
Once you’re done with the install reboot and remove the USB drive. Set your password, make sure your wifi is on, you’re a power user.
Now that you’ve got your Linux Chromebook unleashed, it’s time for the slightly trickier (sometimes) part, install RealVNC server. The reason I chose Ubuntu is that it’s more user friendly when installing certain packages/program. RealVNC is one of those that can either work right away or you’ll spend days running Linux commands to only make things worse before you wipe clean and reinstall and start from scratch. It will probably work right away after that of course…
Installing RealVNC Server
First, go on the RealVNC website and Activate a Home Subscription for your free RealVNC account and to activate Home. Once you enter your email to start, you’ll be sent the download link to get started on the install.
For this I’ll actually defer to the RealVNC help pages. Once again, which is common with Linux, there are great walkthrough instructions out there. I’ll do the same as above, give the basic steps and any comments, but leave the real meat of the steps to the experts.
Steps to Install RealVNC Server
1. Download the x64 .deb file.
2. Install the program by running “sudo apt install ./<downloaded program>”.
3. License and start the server using the vncsetup-helper script.
This should now have the VNC server running on your Chromebook. You may need to reboot however. Once you reboot the server should start automatically on boot and you should see a small icon on the upper right. Click on that to configure your account.
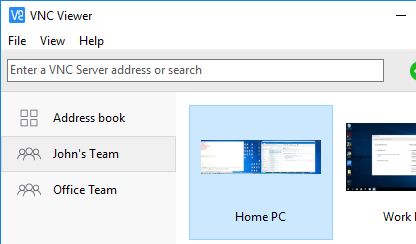
Once your VNC Server is setup and attached to your RealVNC account you should be able to go on to your home computer (or mobile device), launch RealVNC viewer, login and select the remote computer from the team you setup from the RealVNC website.
If you made it this far without any problems, congrats! It took me a day of tinkering around but I finally got it and summed up my steps (that worked) in this post. Hopefully you have the same amount of luck as me or are more of a Linux nerd.
For those that dislike reading, the RealVNC install is all summed up in the video below as well:


router Keenetic with VPN access function, and you don’t need to buy additional computers, but I looked at how to configure it here –
https://www.youtube.com/watch?v=97SDQO4KiQE&t=327s