How a cheap knockoff duct fan almost took out my crypto farm

How is that for a headline? Certainly nothing you ever want to read or even think about. As you can imagine, I feel very blessed and lucky that the circuit tripped before anything worse could happen, but it’s a very good lesson to learn. Mainly, always inspect you equipment, don’t buy cheap unknown knockoffs, and use circuit protection for everything.

So what happened? I was gone for a few days on a work trip so I can’t say the exact time this happened, but I can ball park it since the duct fan killing the circuit shut down the miner as well. A caveat to that is that the miner only shut down because it has programming to shut it off when it gets too hot, which is another learning point for me.

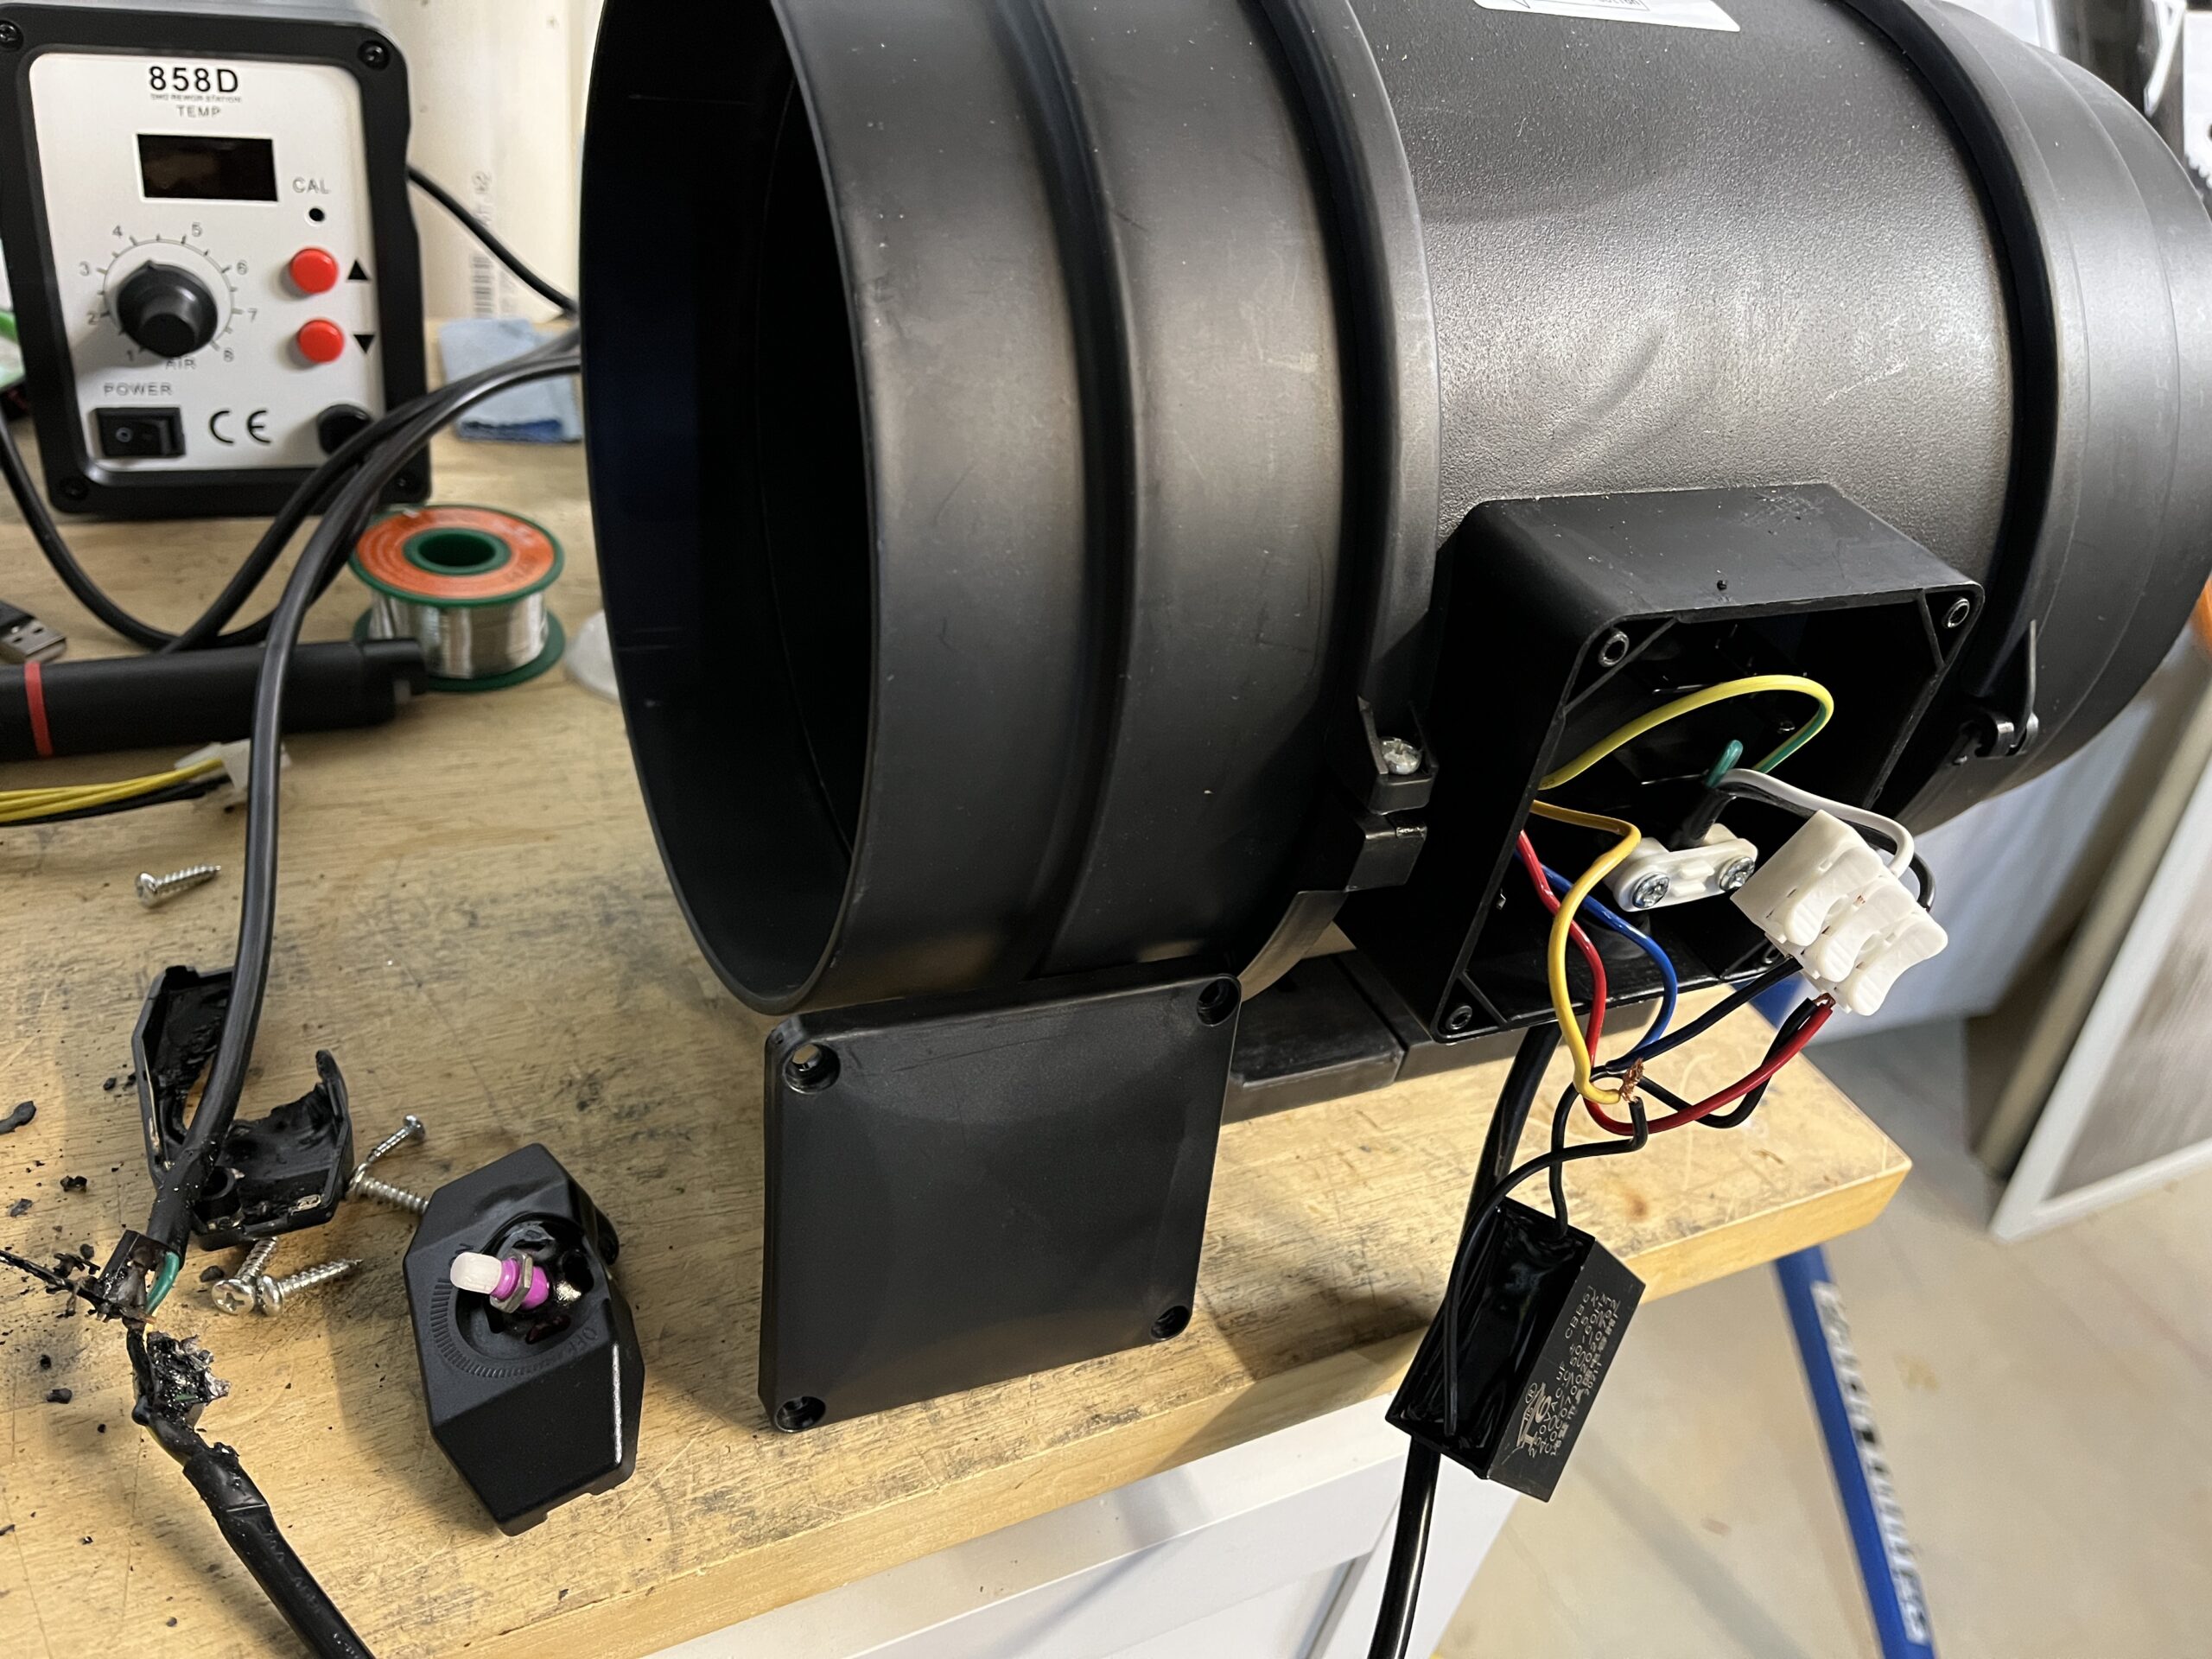
This happened on an L7 I have and I was using the duct fan as the primary cooling and manually set the fans on the L7 to be at 30% (roughly 3000RPM.) Once the duct fan controller burned out the only thing cooling the L7 was its own fans, which I had set too low to actually cool it, hence it shutting down. Lesson here is that I had no need to manually dial the L7 fans at 30%, I could have left it (and will from now on) at automatic and they simply would speed up if the duct fan ever failed. So what if I had removed my onboard fans like several people have mentioned? There’s more of a risk that you could burn up your hash boards before the software catches them heating beyond threshold (90C I believe on the L7.)

I threw a little video together on my lesson learned and what to watch out for.

So you want to buy a crypto miner but don’t know where to start?

I’ve been asked several times how I select miners that I use and what my process was for selecting them. I had to actually give this some thought. Some I select for pure profit, others I select just to review and work on. However, at the end of the day, they all need to make money, that’s what makes the crypto world go round.

I put my thoughts down in a quick presentation, then to make it even more boring I figured out how to record video with it as well. Hope y’all find some use from this and please hit me with any questions.

Basic Multimeter Use for Debugging Crypto Miners

If you’ve owned a crypto miner for at least a year (or bought a used one) odds are you’ve had a problem with it. It’s constantly rebooting, one of the hash boards isn’t working, or a random number of asics don’t show up.

Now what? Do you pack it up and ship it off to be repaired? Or will you roll up your sleeves and get dirty? If it’s the latter of the two, then maybe this is for you. I’ve spent the better part of the last year posting about various projects and fixes for crypto miners but more recently I’ve been messaging with someone who has no experience with electronics. I found it to be a struggle to help, but it’s actually made me think more about how I can help. We started by walking through the basics and worked our way into a fairly technical fix involving re-flashing PIC firmware.

After working through this he mentioned that it would help if there was a basic overview of using a meter when debugging. He had watched my other videos, but I realize now I glance over the settings I use when making measurements and what and why I measure certain things. That brings me to this, a quick tutorial on the basic measurements I find useful when working on miners. It doesn’t go in depth on any specific model, but hopefully shows how/why I use the basics.