You’re better off just buying crypto instead of mining, right???

This is always a passionate discussion in crypto boards. Many say you’re crazy to mine nowadays, or ever, but some say the return on investment is worth it. What’s the right answer? Well, like anything, there is no right answer, just what’s right for you. I’ll walk you through my thoughts and why I chose to mine.

First let’s pick a date in time that we can use as a baseline, how about 12 months ago to the day I wrote this. So our baseline date is 1/19/2022, and here are the current prices of equipment and crypto I’ll use in this analysis:

BTC$42,374.04
LTC$141.89
ETH$3163.85
S19 95TH (approx.)$8,800
L7 9300 (approx.)$19,200
Baseline costs on 01/19/2022

Now we obviously need to have the same costs as of today, 1/19/2023 for comparison purposes:

BTC$20,713.82
LTC$82.87
ETH$1515.73
S19 95TH (approx.)$1,800
L7 9300 (approx.)$9,500
Comparison costs on 01/19/2023

Now obviously we’ve been in a crypto bear market, but that’s not an excuse nor a reason to discount the relevant argument which is what’s better, mining or purchasing crypto? Let’s see how it shook out over the past 12 months.

Let’s take a few cases and walk through the numbers. I’ll do my best to estimate costs (a lot of it is actual numbers as I run the miners I’m using in the examples) and keep things on the level. I make several assumptions which may not be your exact case, but I have to make them to compare apples to apples. Also this all assumes that we buy and operate everything on the baseline day until we sell everything on the comparison end date.

Case exampleStarting InvestmentEnding Investment
1 – Purchasing 2 BTC miners$20,000$6,536
2 – Purchasing an LTC miner$20,000$18,415
3 – Buying BTC$20,000$9,776
4 – Buying LTC$20,000$11,681
5 – Buying ETH$20,000$9,581
Case summary table

As you can see, in every case we take a loss. What’s interesting is how much less the loss is by selecting the right miner. I’m not advocating to anyone how to spend/invest their money however when I do chose to invest, this is the methodology that I use. Now how did I come up with the data? You can read the summary of each case below. Like I’ve said before, everyone’s numbers will vary depending on several factors but this hopefully gives you some insight into one method of how to choose which route to go.

Case #1 – Investing $20,000 primarily into BTC mining

In this case we’ll purchase two S19 95TH for $8,800 each ($17,600 total) and put the final $2,400 into BTC. For starters, over the course of the last year that $2,400 in BTC is now worth about $1,174.

The $17,600 we spent on the two S19 95TH has yielded us approximately .25 BTC (using a linear regression from mining over the past year) and at today’s price that’s around $5,178. We need to subtract for electricity however so we’ll use the rate I’m at which is around $0.06 per kwh, which equates to $4.68 a day or $1,708 a year per miner. That’s a total electricity cost of $3,416.

The residual value (just work with me here people) of the miners is approximately $1,800 each ($3,600 total) as of 01/19/2023.

So our end-state for this scenario is:

$1,174 BTC investment

$5,178 BTC mined

$3,600 S19 95TH value

-$3,416 operating costs

Our initial $20,000 investment is now worth $6,536.

Case #2- Investing $20,000 primarily into LTC/DOGE mining

In this case we’ll purchase an L7 9300 for $19,200 and put the final $800 into LTC. For starters, over the course of the last year that $800 in LTC is now worth about $467.

The $19,200 we spent on the L7 has yielded us (using a linear regression from mining over the past year) approximately 131 LTC over the year, at today’s price that’s around $10,856. We need to subtract for electricity however so we’ll use the rate I’m at which is around $0.06 per kwh, which equates to $4.68 a day or $1,708 a year.

The residual value (just work with me here people) of the miner is approximately $1,800 as of 01/19/2023.

So our end-state for this scenario is:

$467 LTC investment

$10,856 LTC mined

$8,800 L7 value

-$1,708 operating costs

Our initial $20,000 investment is now worth $18,415.

Case #3- Investing $20,000 into BTC

In this case we’ll simply buy $10,000 worth of BTC and see where that takes us. The math is pretty straight forward here, our end-state for this scenario is:

$9,776 BTC investment

So our initial $20,000 investment is now worth $9,776.

Case #4- Investing $20,000 into LTC

In this case we’ll simply buy $20,000 worth of LTC and see where that takes us. The math is pretty straight forward here, our end-state for this scenario is:

$11,681 LTC investment

So our initial $20,000 investment is now worth $11,681.

Case #5- Investing $20,000 into ETH

In this case we’ll simply buy $20,000 worth of ETH and see where that takes us. The math is pretty straight forward here, our end-state for this scenario is:

$9,581 ETH investment

So our initial $20,000 investment is now worth $9,581.

Quick hack to monitor that your L7 (or any miner) is working

I’ve seen a lot of posts lately, and even got an message or two, asking how I remotely monitor my L7. Since (as of 8/12/22) there isn’t any after-market firmware available, nor would I suggest using any while your system is under warranty, some hacks and work-arounds are needed.

First, I use VNC Server to remote into my miners. This is a great and powerful tool and there is a free version available. I run it on a variety of systems; old Windows laptop, Raspberry Pi, and even a Chromebook I bought and hacked into Linux.

That solves the remote login issue, but what about alerting you when it’s down? There’s scripts you can write that can verify pings every so often, and that will tell you if it’s alive. But what about if it’s hashing?

To solve that I look at it inversely, I want my miner to tell me it’s down, but if that’s not easily available, then I want it to tell me it’s working. So how can we do that? It’s not as hard as you might think, in fact it’s a quick and easy hack. First, this will depend on what pool you mine and what the payout interval is. For example, if you use Litecoinpool you can set a payout threshold to meet a time interval of roughly 4 hours. For Nicehash it just happens every 4-6 hours. Why is this important you might ask?

Now let’s look at your wallet. Pretty much every wallet on earth allows you to receive a notification when you receive a payment. I have a wallet that I use for mining that I have an alert set for any incoming payment. So, knowing I have a payment threshold of 0.1 LTC on Litecoin pool, for one L7 I expect a payout roughly every 5 hours. If I don’t receive a text alert every 5-6 hours from my wallet that a payment was received I can login with VNC and verify that I’m still hashing.

Is it perfect, no, but it works for me and was a quick and easy hack to make sure I don’t have to constantly login to monitor miners. I know there are better hacks, feel free to share, that’s what this community is all about!

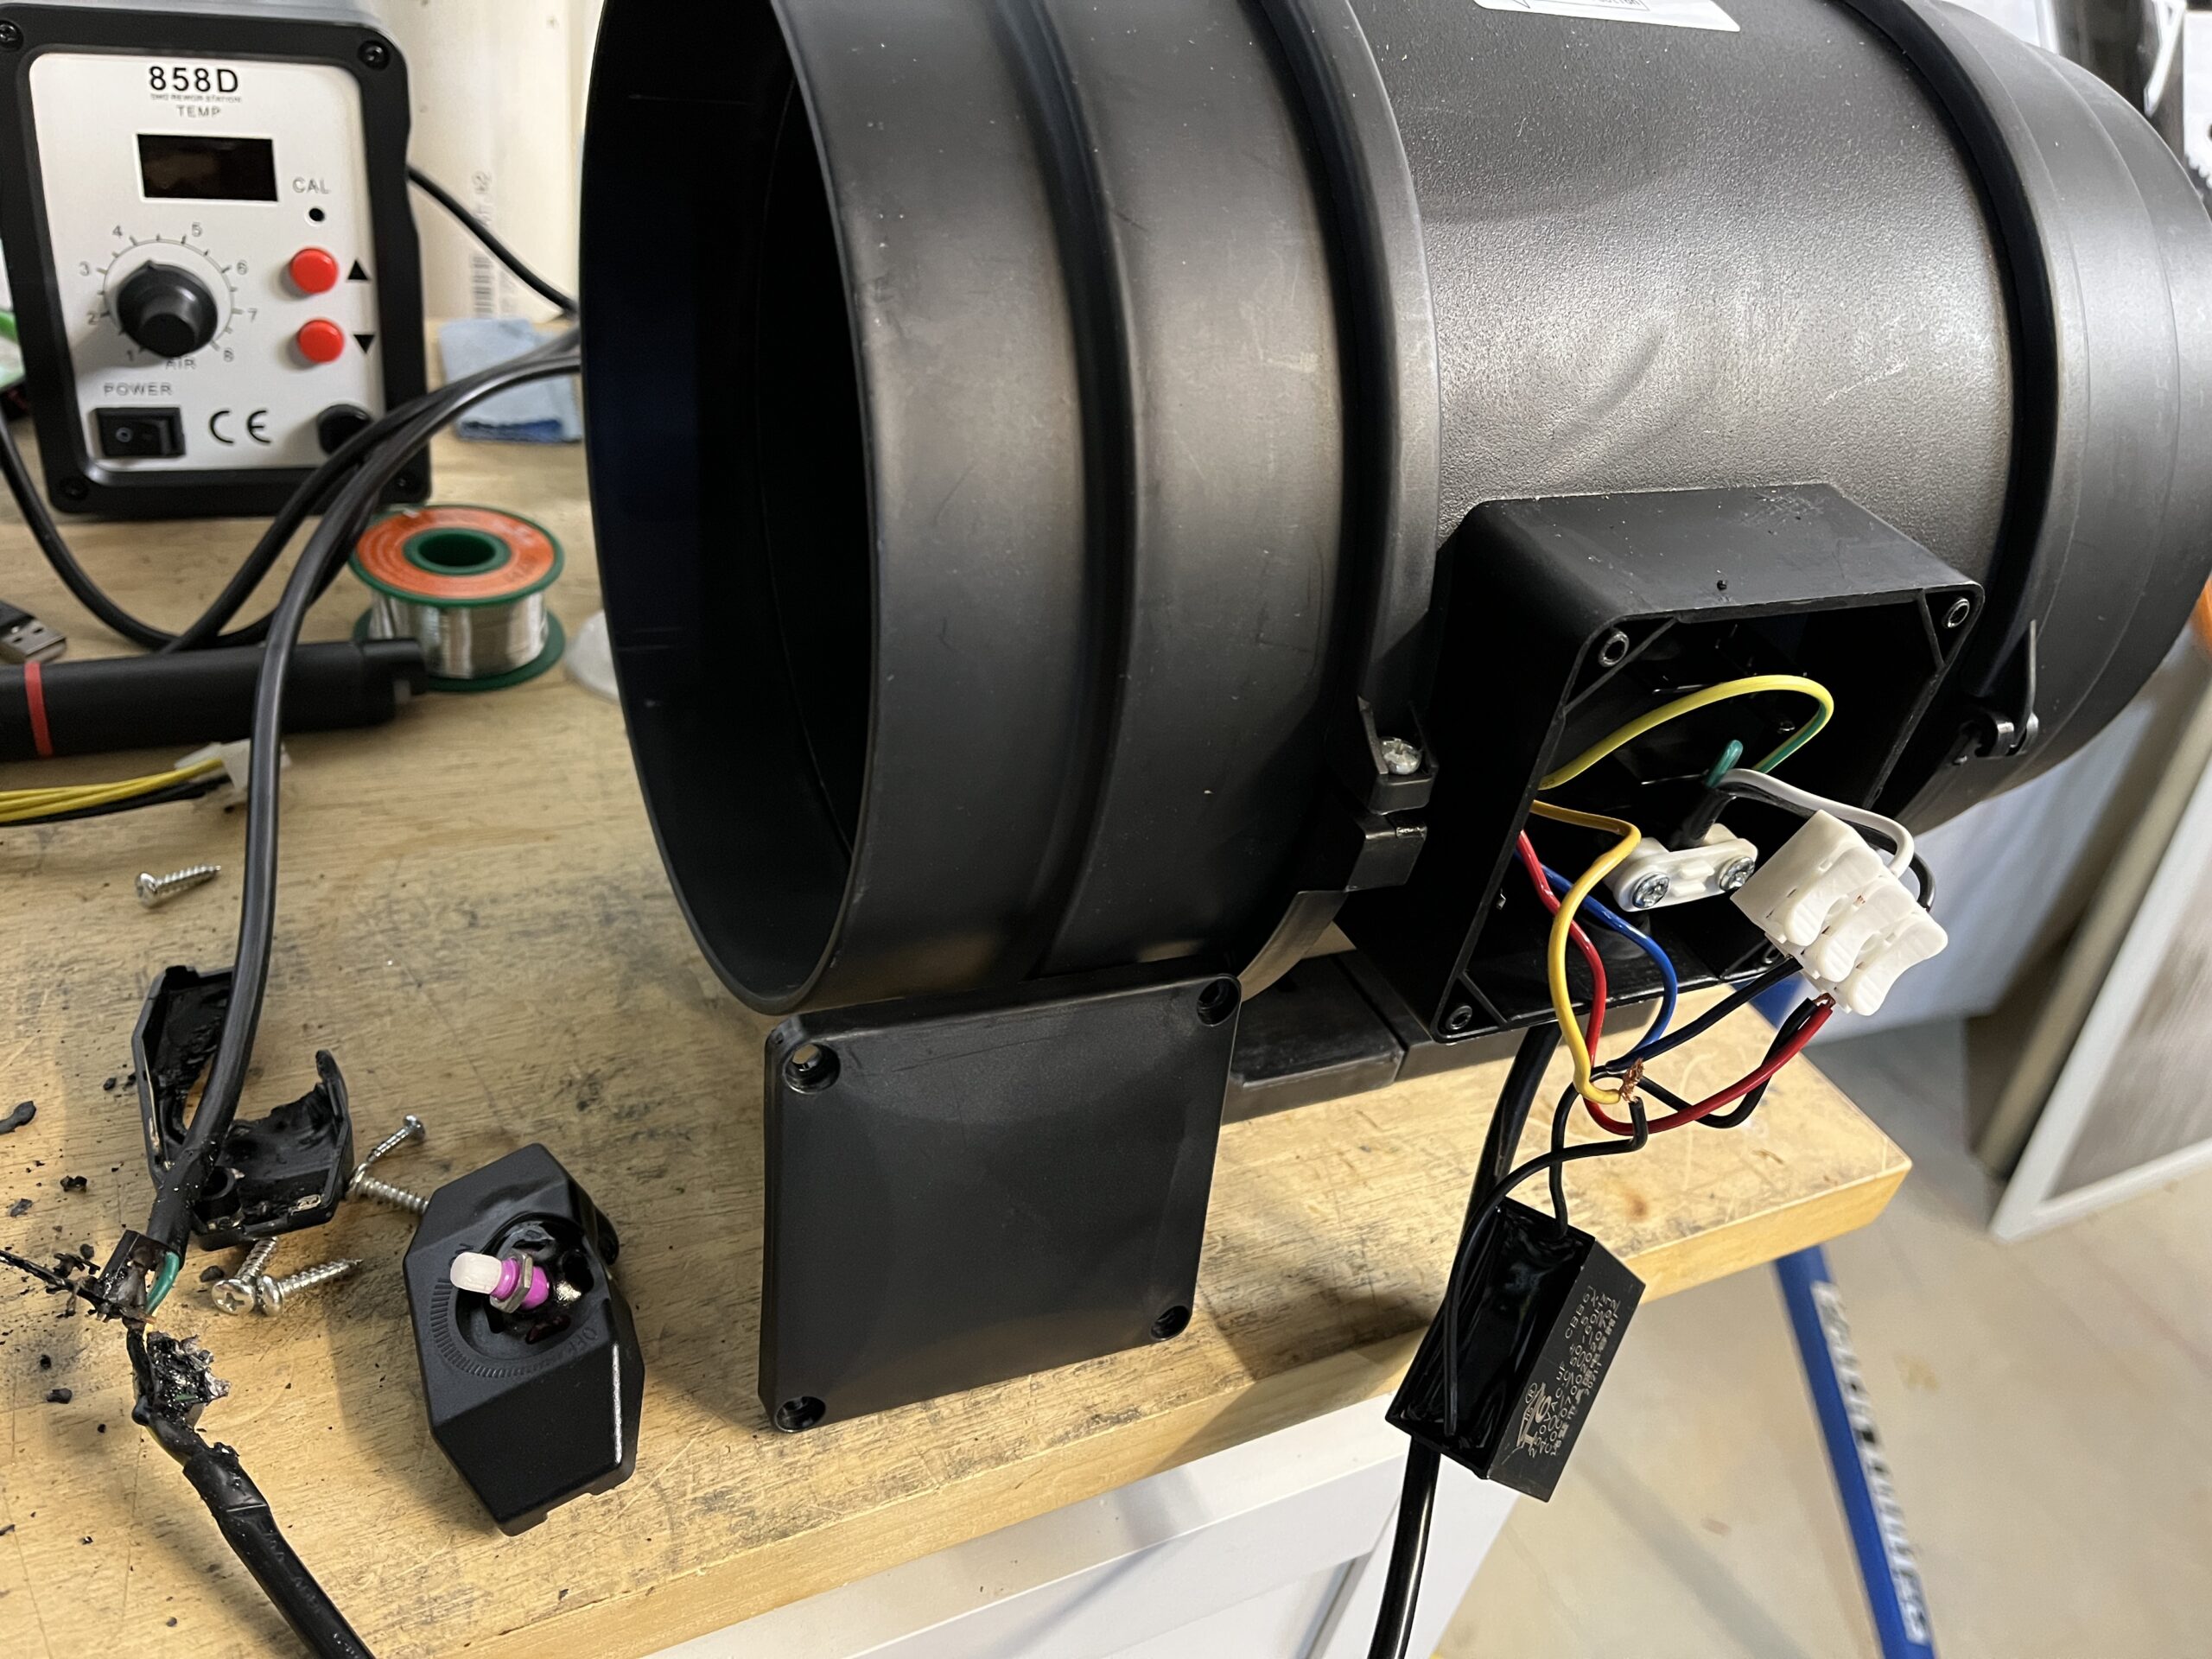
How a cheap knockoff duct fan almost took out my crypto farm

How is that for a headline? Certainly nothing you ever want to read or even think about. As you can imagine, I feel very blessed and lucky that the circuit tripped before anything worse could happen, but it’s a very good lesson to learn. Mainly, always inspect you equipment, don’t buy cheap unknown knockoffs, and use circuit protection for everything.

So what happened? I was gone for a few days on a work trip so I can’t say the exact time this happened, but I can ball park it since the duct fan killing the circuit shut down the miner as well. A caveat to that is that the miner only shut down because it has programming to shut it off when it gets too hot, which is another learning point for me.

This happened on an L7 I have and I was using the duct fan as the primary cooling and manually set the fans on the L7 to be at 30% (roughly 3000RPM.) Once the duct fan controller burned out the only thing cooling the L7 was its own fans, which I had set too low to actually cool it, hence it shutting down. Lesson here is that I had no need to manually dial the L7 fans at 30%, I could have left it (and will from now on) at automatic and they simply would speed up if the duct fan ever failed. So what if I had removed my onboard fans like several people have mentioned? There’s more of a risk that you could burn up your hash boards before the software catches them heating beyond threshold (90C I believe on the L7.)

I threw a little video together on my lesson learned and what to watch out for.

How to troubleshoot your L3+ using the kernel log.

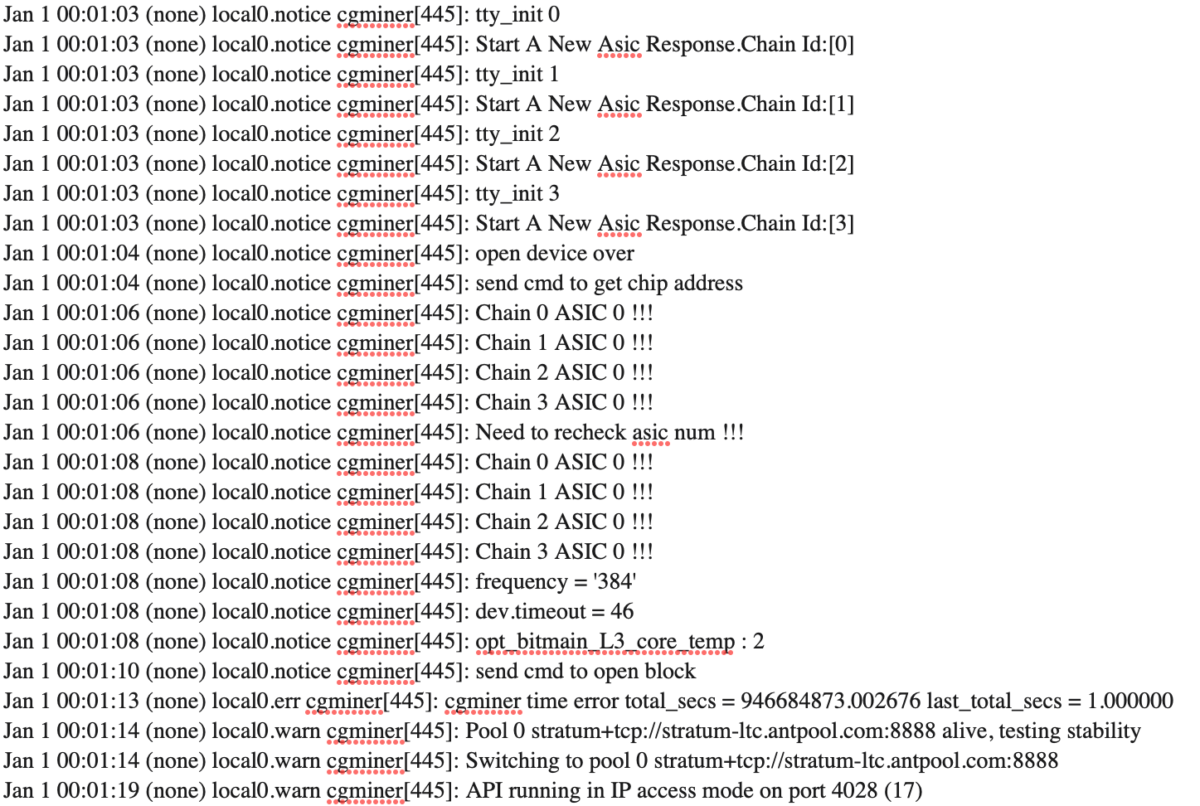
We’ve all had miners fail (if you’re here that’s most likely why), it’s frustrating, maddening, but gosh darn-it, people like you. After you’re done staring in the mirror, it’s time to start figuring out what to do. The number one thing I tell everyone I’ve worked with is to save that kernel log! I mean don’t turn the miner off until you’ve gone into the settings and copied and pasted that log into a file you save. The answer to your question may be in there.

Why save the current log? Well, for one thing that’s the “black box” of what happened. All communications between the boards and the mining pool are there and you want to know what the last thing was that happened before things went awry. Most miners (at least ones I’ve worked with) don’t save the log if you power down and reboot, it will instead overwrite with a new one. There are ways to recover it however, but unless you’re a more advanced user that knows how to SSH in, that’s not something that is easy to walk through.

There are many things that the kernel log can tell us that will point directly to the issue at hand, below are just some of the more common ones (and some uncommon) that I’ve come across:

Chain X ASIC 0 !!!

0 ASICS isn’t always a death sentence.

Another very frustrating error with very little data. Luckily most of the time this is a rather simple fix for being such a vague error. This error essentially tells you that when the control board polls the hash board (via I2C bus) it gets either no response or an improper response from the hash boards PIC after it initializes. Sometimes it will even come back with a number like Chain 2 ASIC 23 !!! which points to ASIC 24 as the specific issue, however a ASIC 0 points to a few things we can try to fix.

CHECK VOLTAGES AT THE 10V BUCK CONVERTER AND 14.2V BOOST CIRCUIT.

Sometimes, more often than it should, the boost circuit on the hash board fails and subsequently asics show as missing or ‘xxxxxx’. Check out my walkthrough manual and scroll to the 14.2V Boost Circuit for more info. Furthermore insure the output of the 10V buck converter matches the voltage you’ve set in the firmware for that chain (i.e. common voltages like 9.5V, 9.8V, or stock voltage of 10.11V.)

CHECK VOLTAGES AT YOUR LDOS.

The  L3 has 12 voltage domains, each controlled by a single voltage regulator. Most recently Bitmain used an LN1134 but has used an SPX5205 and SGM2202 in the past. In the past these domains have failed when the 14.2V circuit failed so it’s a good idea to check the voltage at each domain. This can be done by checking the voltage between pin 2 (middle pin on LDO) and pin 1 (input ~2.4V) and pin 5 (output ~1.8V.) Check this at each LDO (i.e. U75, U76, U77…) Check out my walkthrough manual and scroll to power domains for more info.

COLD RESTART THE UNIT.

From time to time intermittent problems like this can be solved by shutting the unit down for 30 seconds and then rebooting. This isn’t a long term fix but may get your unit back up and running for the time being.

LOWER THE FREQUENCY AND INCREASE THE VOLTAGE.

Go into your advanced settings for the problem hash board and try lowering the frequency and upping the voltage to at least 9.8V. Tuning the hash boards to run on minimal speed and power can have the board operating at the edge of its ability to function. Resetting the PIC to a more normal operating condition may solve your problem. Likewise operating at too high a frequency and power can potentially shorten the life of components or operate on the edge of functionality.

RELOAD THE FIRMWARE.

Sometimes reloading the firmware, especially with one that allows autotune, can help isoloate or even fix the problem if it’s with the PIC.

REFLOW THOSE SOLDER JOINTS!

An intermittent connection can change with environmental conditions . Heat and cold can flex cold solder joints and ultimately lead to failures. I’ve found that reheating and reflowing the joints on the temp sensor, buck converter, and PIC have resolved problems I’ve had in the past with missing components.

Reflowing solves the problem (sometimes.)

Fan Errors

There are a couple errors that can be associated with fans and they’re pretty straight forward to troubleshoot. The first is below, some older versions of the L3 firmware had this error, most newer and after-market versions don’t however. This points to a failing or failed fan.

Fatal Error: Some Fan Lost or Fan Speed Low!

However as the fans do start to fail, below is the message you may get. For reference fan 1 is the fan plugged into the connector closest to the front of the unit.

Fan Err! Disable PIC! Fan1 speed is too low 390 pwm 44

Fan Err! Disable PIC! Fan1 speed is too low 0 pwm 100

Another thing that points to fan errors is no hashing as the firmware shuts down the hash board if there’s a fan failure to save a thermal runaway condition. Basically, change your fan, eBay is a gold mine for these!

Get Temp Data Failed

This is pretty straight forward and almost always points to a bad TMP451 on your hash board. This error tells you exactly which chain has the failure so you can first try and reflow the solder on the TMP451 (the quality varies) or replacing the chip. I have a link to replacement parts here. The caveat is that this doesn’t always affect hashing and some firmware versions will regularly report this error due to a firmware glitch (per Bitmain.)

Get [1]Temp Data Failed!

Network Errors

Net Err! Frustrating and generally means you’re not making $. Most of the time you may see an error like below:

Net Err! lastest job more than 2 mins! waiting …

This is most likely due to one of three common problems.

  1. You have a poor network connection
  2. Your network cables or router have failed
  3. Your stratum address is entered incorrectly

Number of “x” = 4 of Chain 0 Has Exceeded Threshold (on any Chain…)

This can point to a number of issues. Generally when you see this error in the kernel log that is the point at which the hash board shuts down or, if you have a hash rate watchdog enabled, it will reboot. This is generally due to boards overheating or running too “hot” of a frequency. These issues can generally be remedied by lowering the frequency you’re operating the hash board at.

Scanreg Error

The infamous scanreg/crc5 error can be quite frustrating, but know that the secret to this generally lies in the ASIC chips themselves. The problem generally starts by seeing a series of the following in your kernel log:

bitmain_scanreg,crc5 error,should be 00, but check as 01…..

This is essentially pointing to an ASIC failing its self test. Sadly I haven’t seen a way in the kernel log to point to a specific ASIC, but following my post on CRC5 errors will help you track it down using your multimeter.

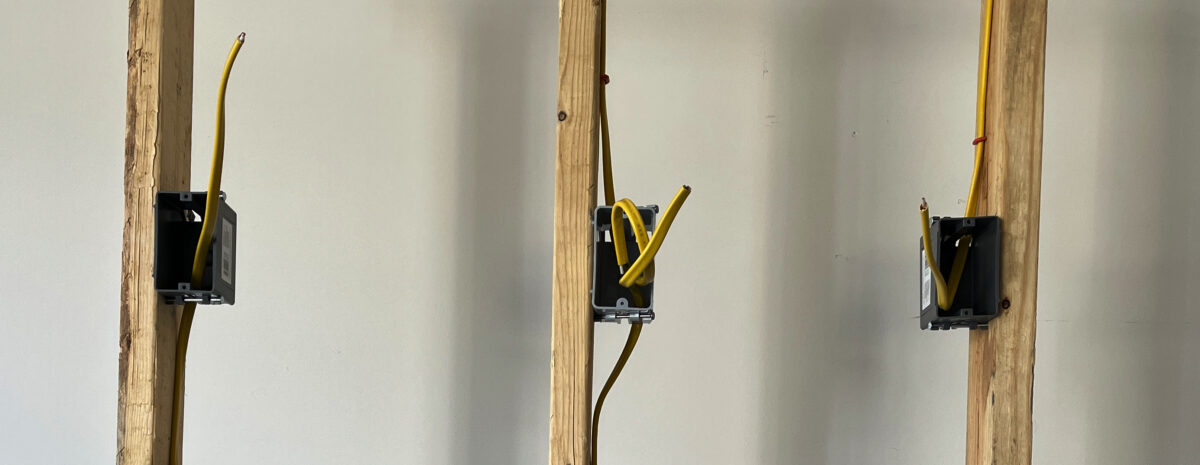
Installing 120V or 240V 20A branch circuits for your crypto miners

In my series of, “I know what I want to see, but what do you want to see?” videos I had someone ask about the installation of basics 120V or 240V circuits. Well, you got it. I’ve done electrical work for years off and on, that along with some University training should hopefully lead to some useful insight in the below video.

Of note, and a disclaimer, I am not a licensed Electrician, so please consult an Electrician, NEC code, or your local inspector before energizing any circuits. If you’re doing this in your home you’ll most likely need to pull a permit for it anyway, but many areas allow homeowners to do their own work as long as it meets code.

Cooling and Quieting down an L7/S19

Ever have the feeling that you’re about to have an aircraft take off from your house? If so, you’re in good company (and making money) but the FAA hasn’t found you yet and last thing you need is the HOA bitching about your plane not fitting in your garage (and you left your garbage cans out.)

Cameron Airpark Estates.

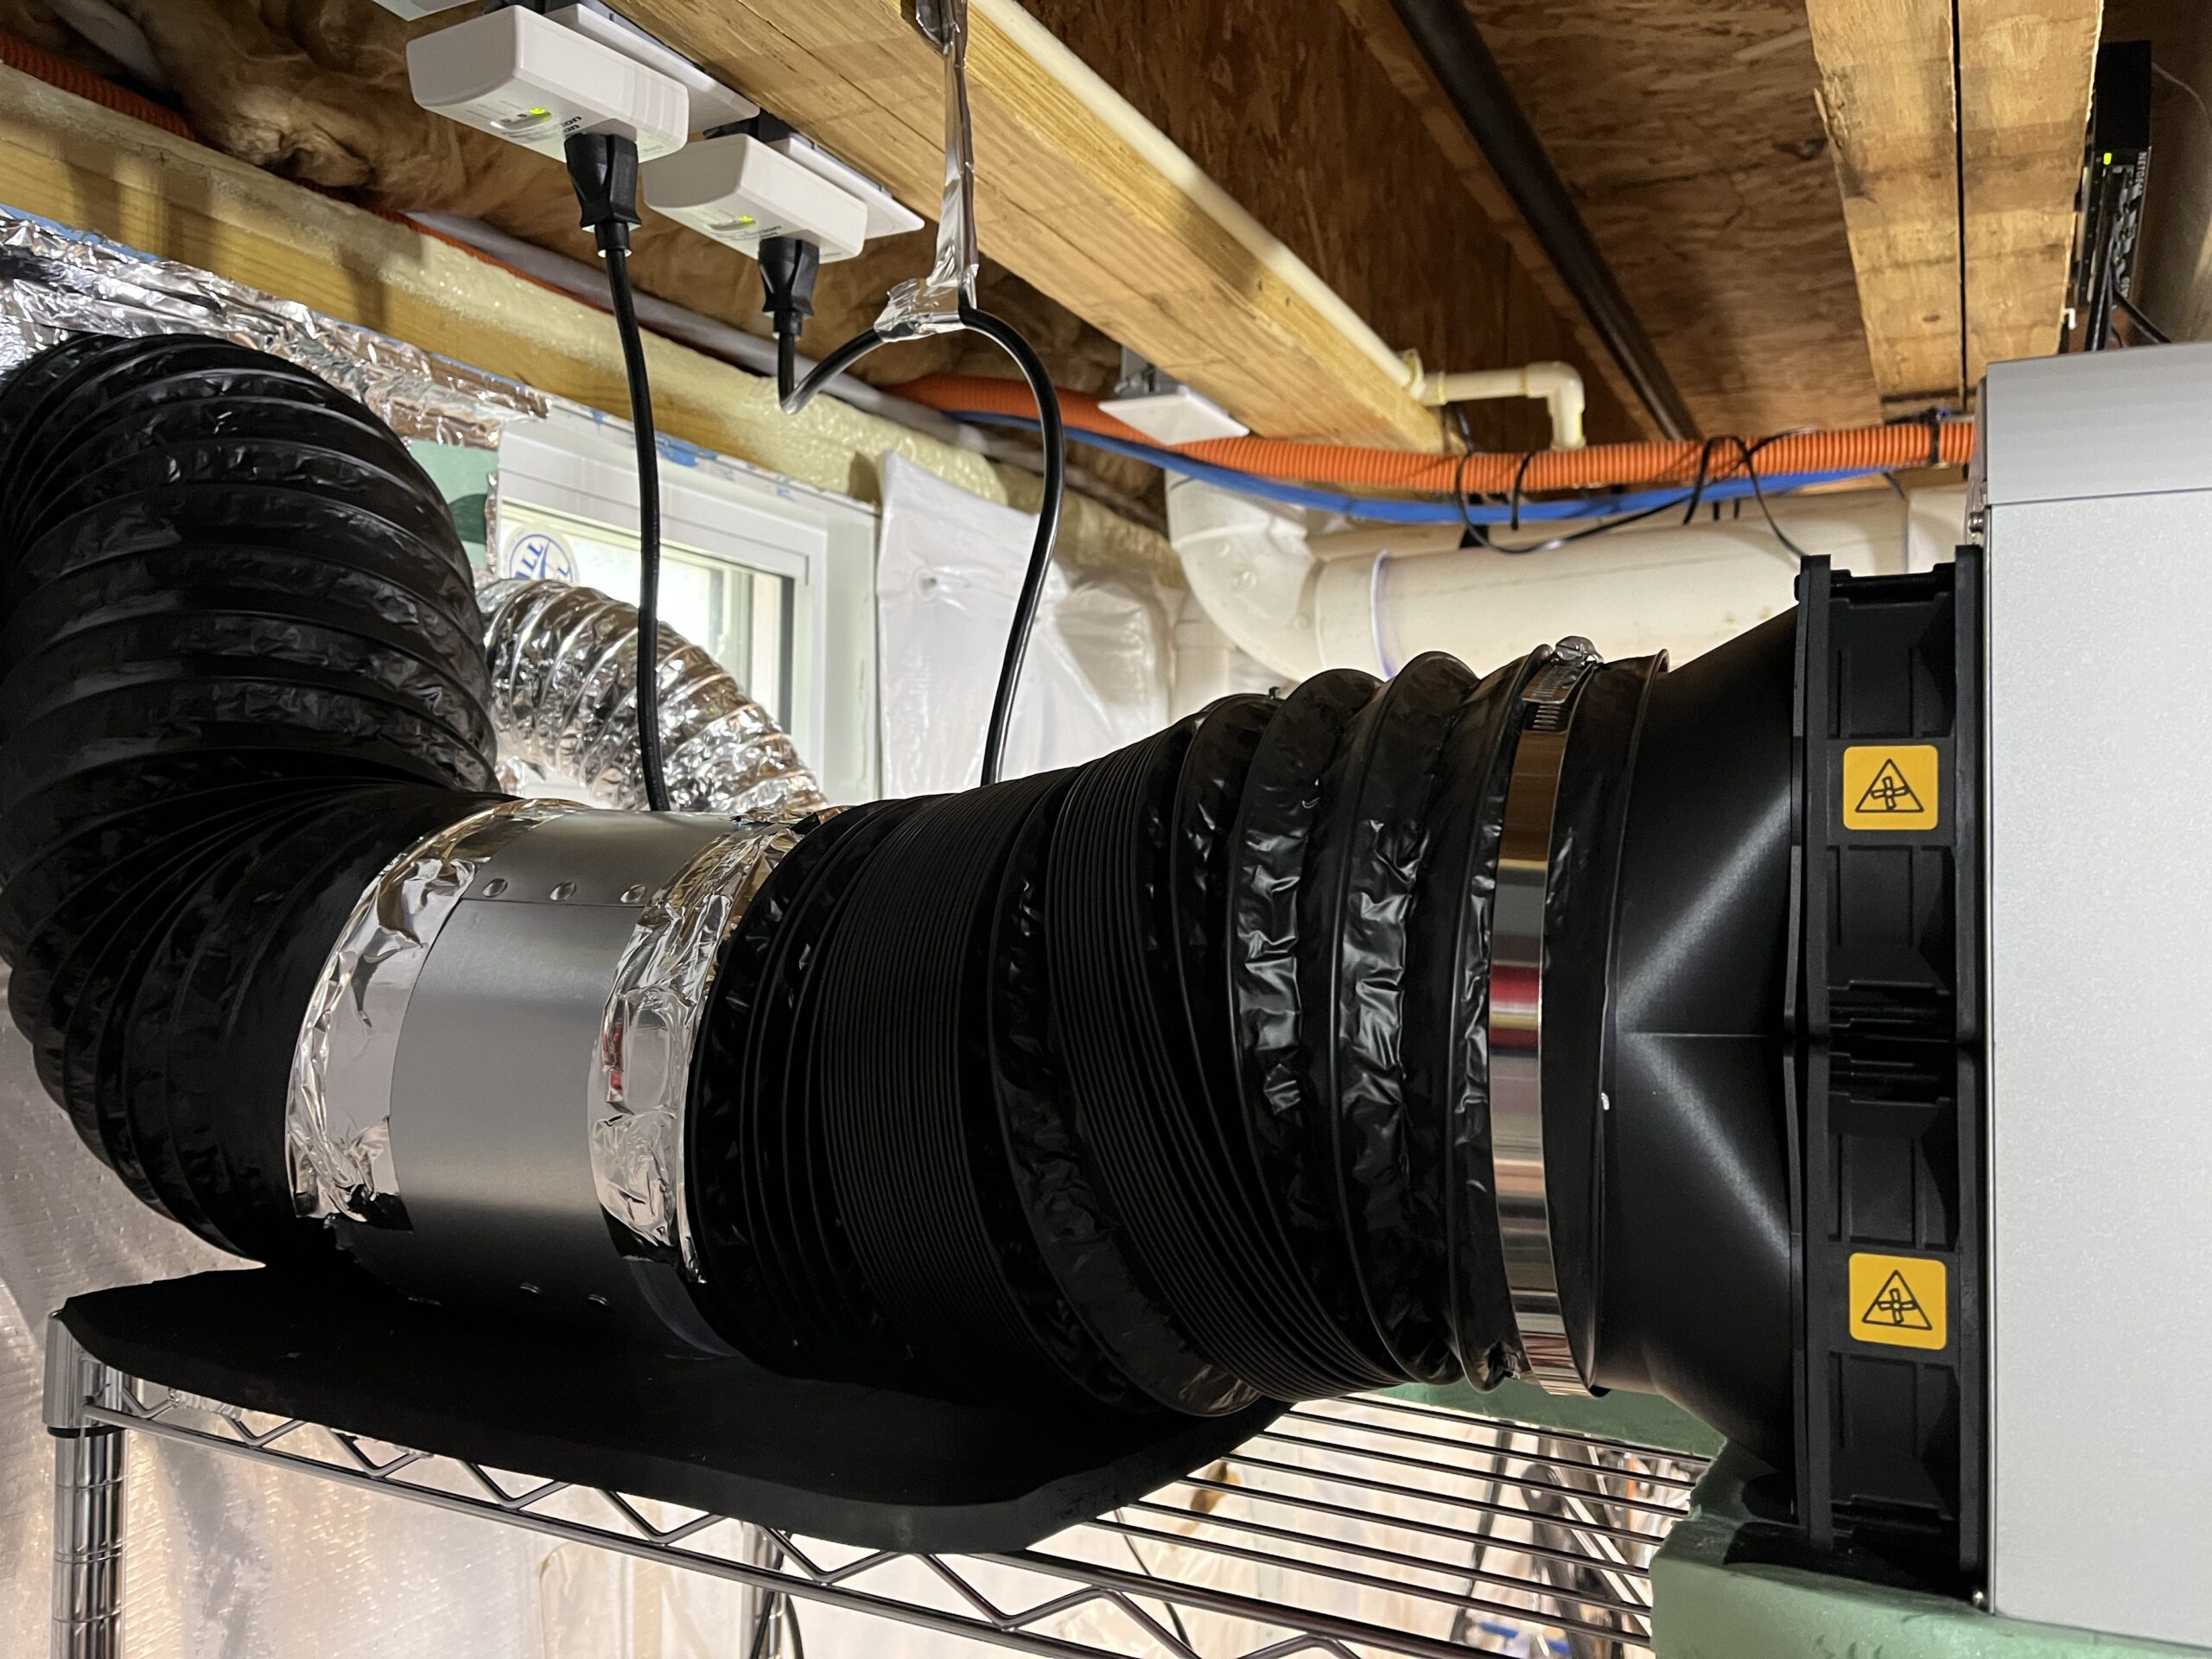
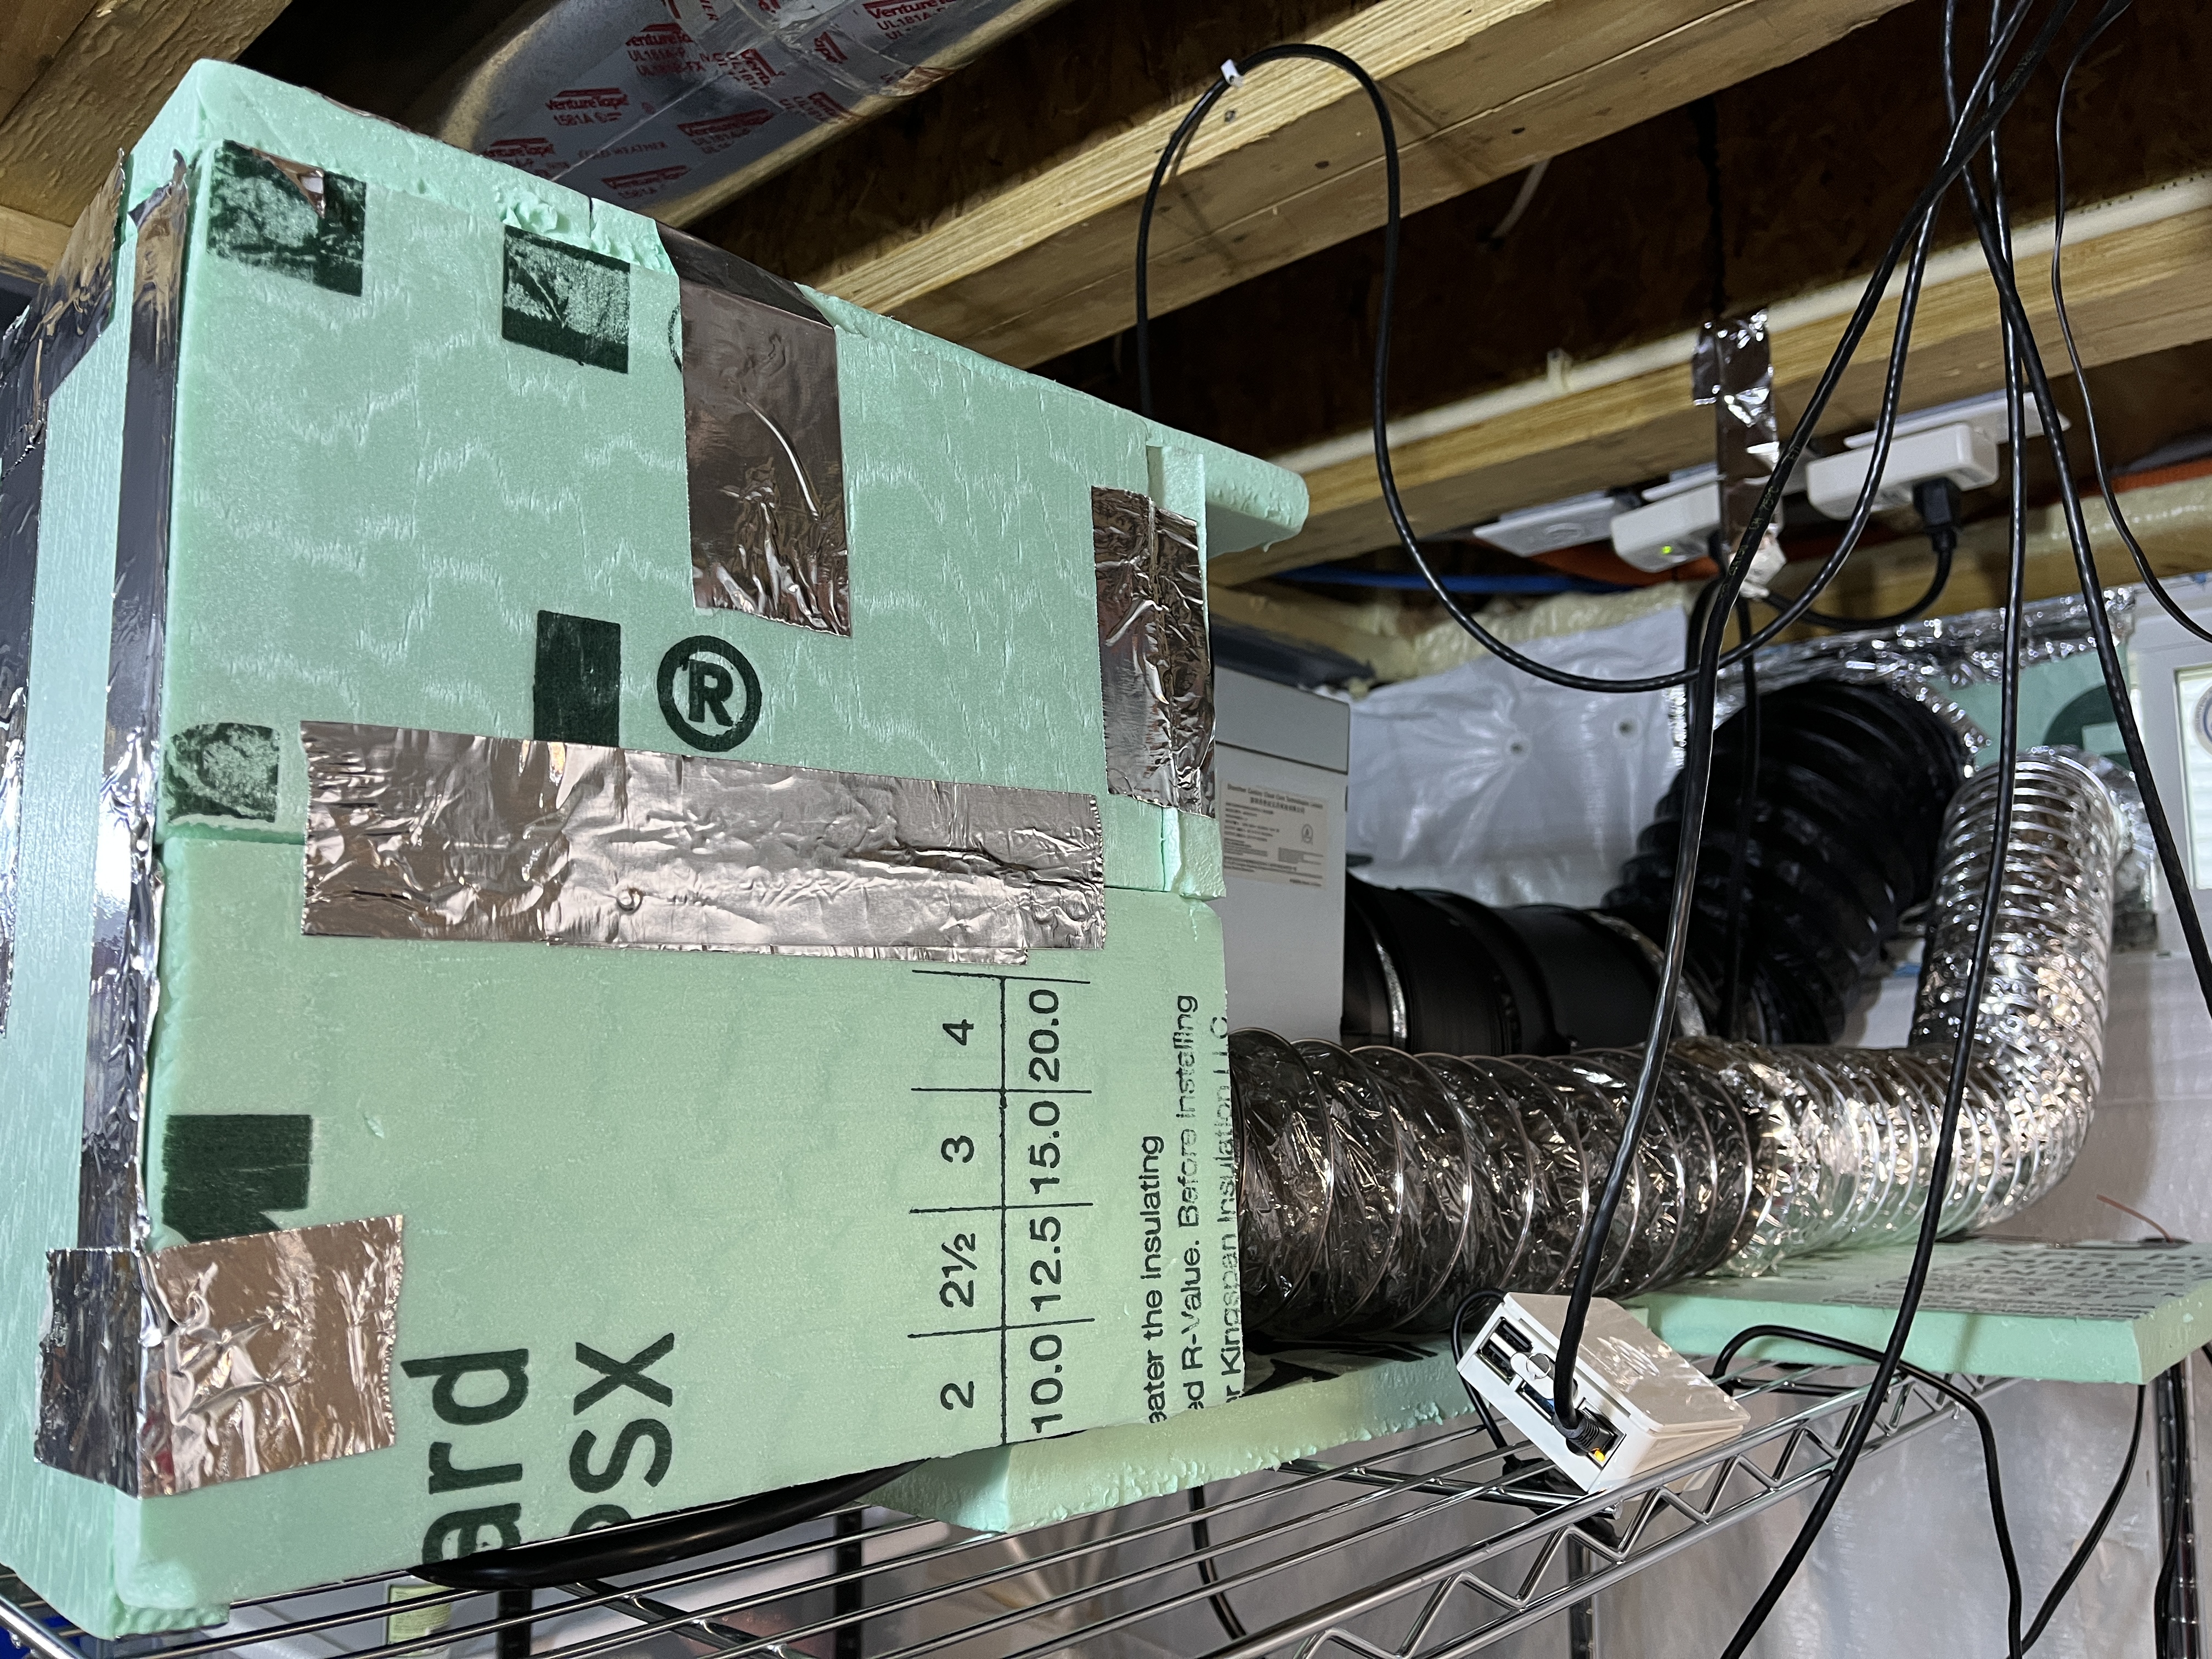
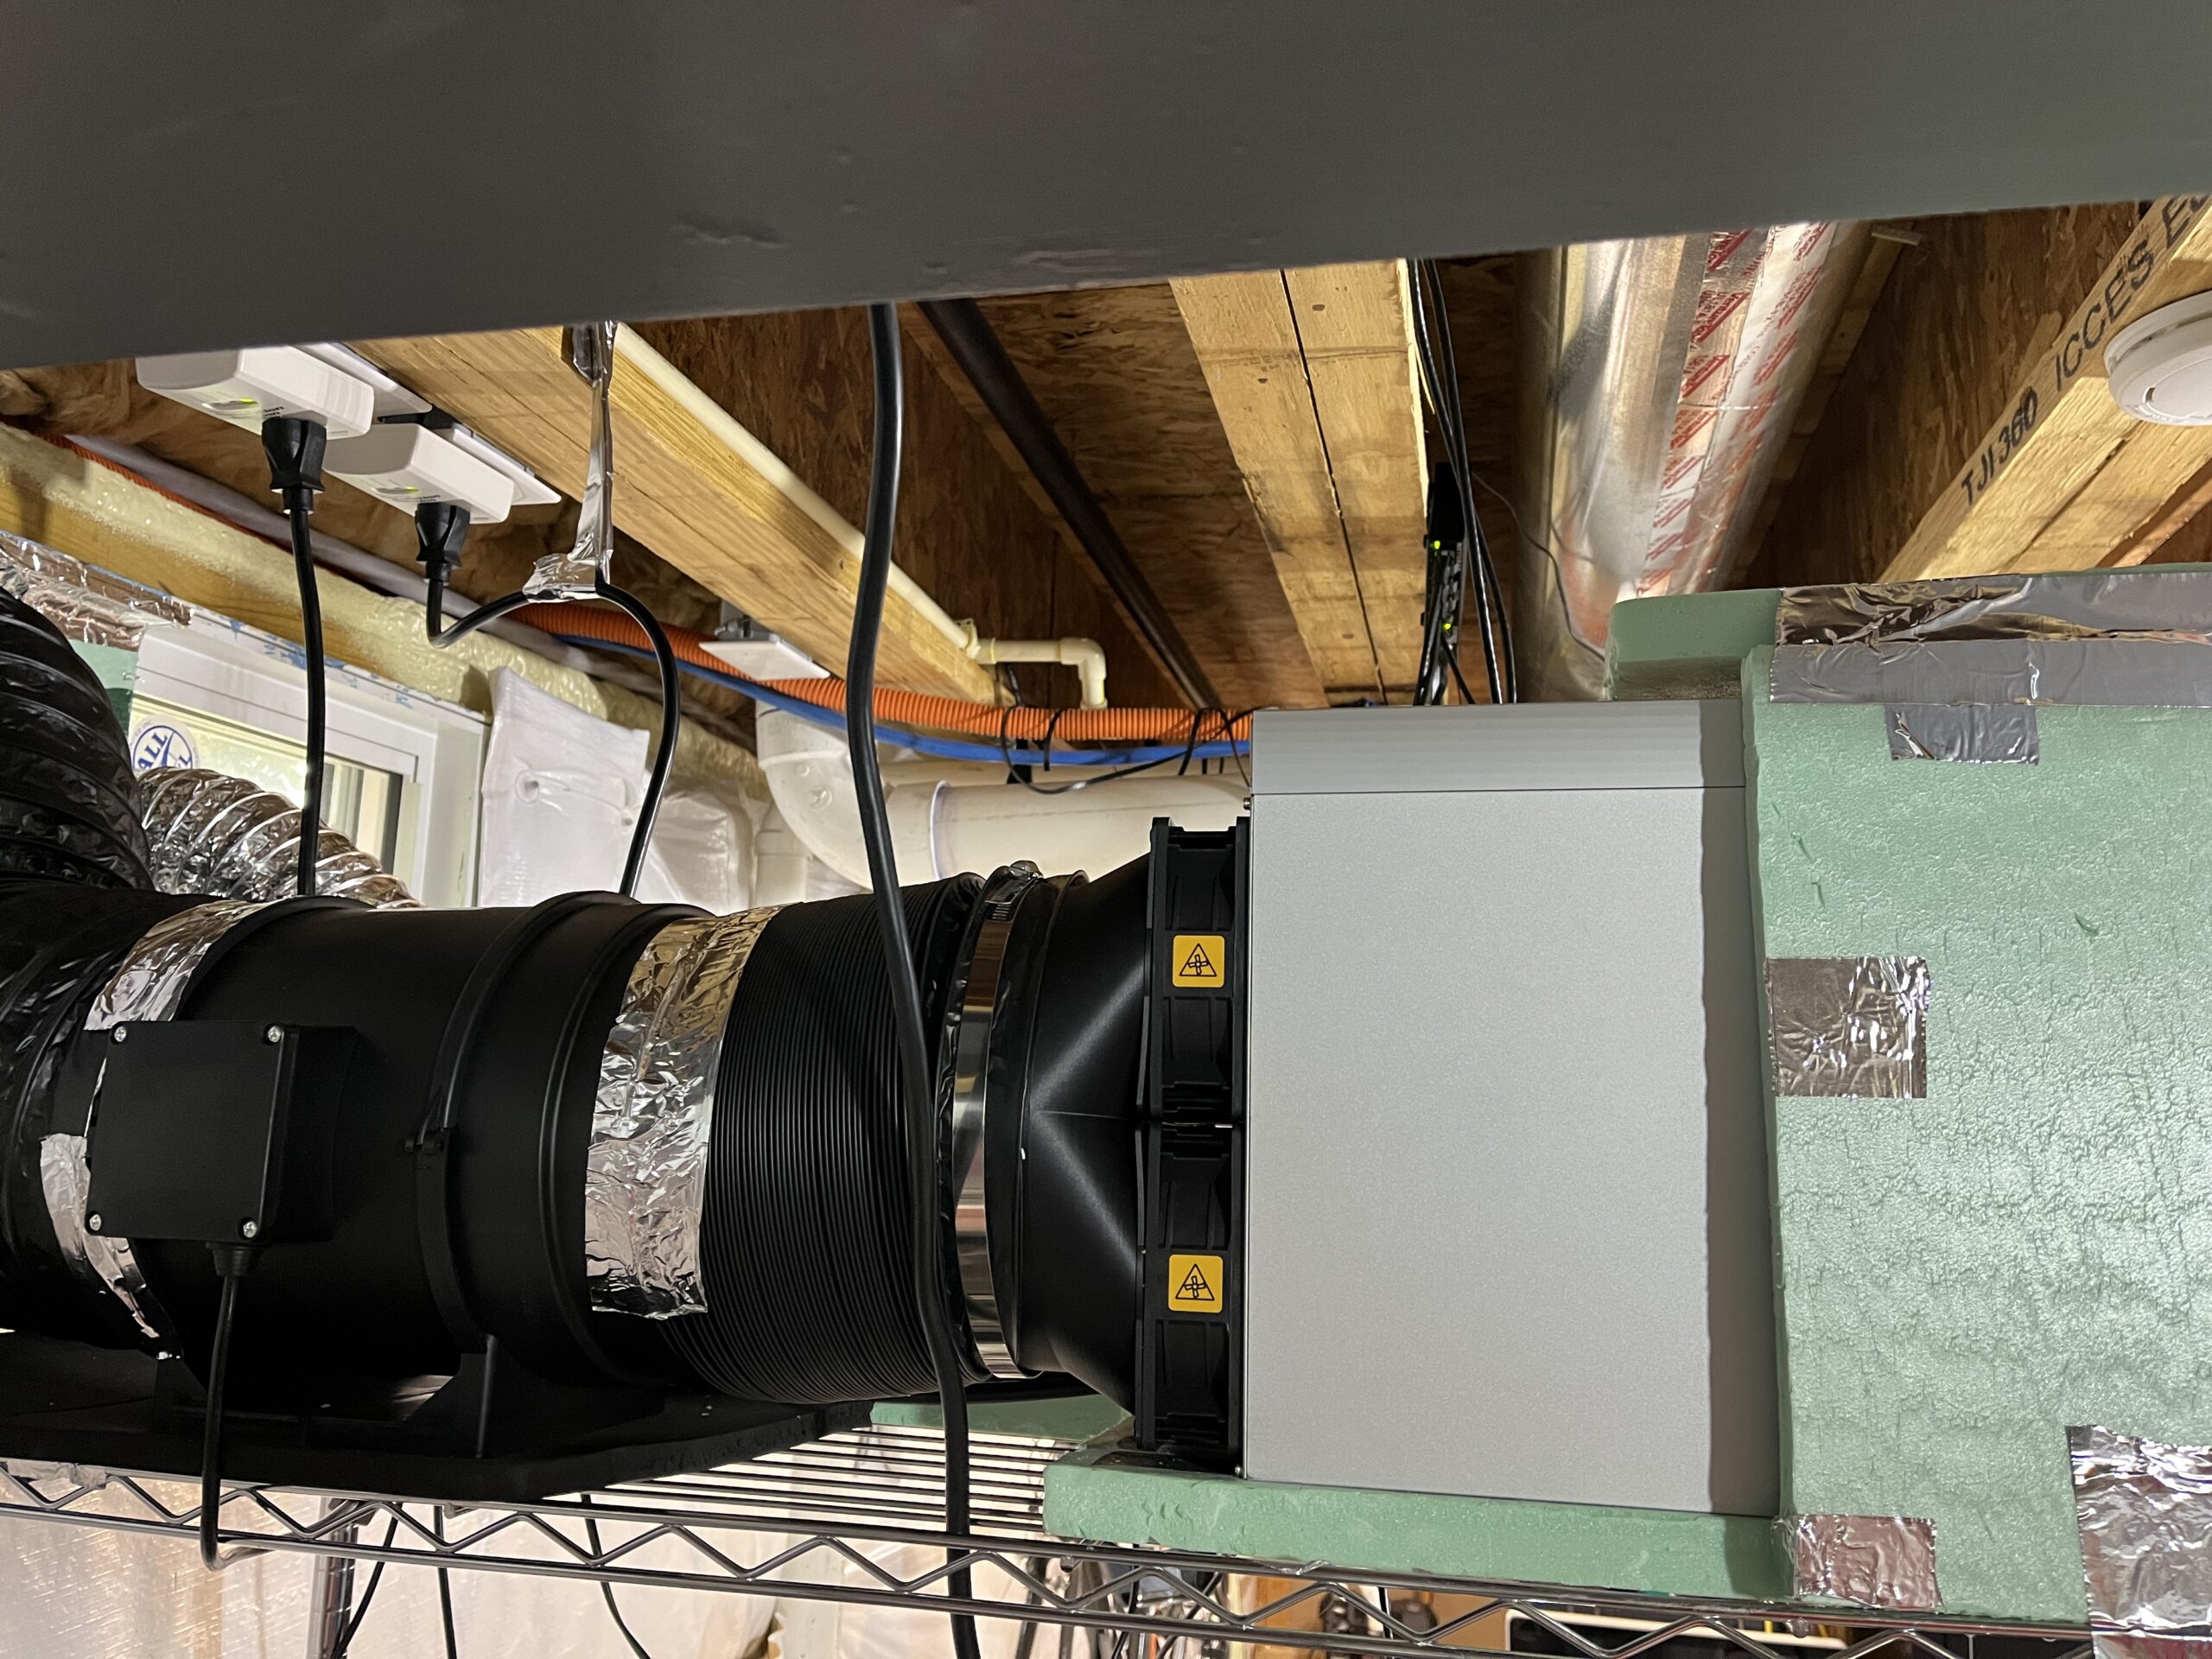
So I had been running a Bitmain L7 aircraft, or miner, for about a week and couldn’t get the fans under ~5300RPM, which btw creates that nice high pitched whine you can hear throughout the house. My setup was an open inlet, an 8″ dual fan shroud (https://ebay.us/13zn51) on the exhaust to an 8″ duct (amzn.to/3DgKYy4) , then ducted pretty much straight out a window. I have a 6″ duct in the window as well to keep fresh air vented in. With this setup I saw the following on the L7:

Output Fan RPM – 5280 – 5500 RPM

Output Temps (highest board 74C/72C)

81 dB @ 1 foot (measured)

Good, not great, but good. How can we get these temps down I thought and if I get them down enough will the fans slow down?

To increase airflow in the exhaust duct I installed a 420 CFM 8″ duct fan (amzn.to/3wF6XNR) and that brought me to the following on the L7:

Output Fan RPM – 5180 – 5280 RPM

Output Temps (highest board 73C/71C)

80 dB @ 1 foot (measured)

Duct fan power usage – 55W (measured)

Regardless of the dB level, the fans were still running high enough that the fan whine just resonated through the house, there’s got to be a better way, STOP THE MADNESS! Well, if some airflow brought it down a little, a lot of airflow may bring it down a lot?

If you read my previous bloguverse post on What’s my fans CFM and how do I measure it then you know that a 420 CFM vent fan might not be enough to create negative pressure with the Bitmain L7 fans running that high. A big reason for an exhaust duct fan is to create the negative pressure to help cool and vent the unit. A tell tale sign your duct fan is working in this fashion is the miner fans themselves slowing down while temps stay the same or drop. Another way to test this is to cut a small opening in the duct between the miner exhaust and duct fan. If air is blowing out then your duct fan isn’t creating negative pressure, it’s actually adding resistance. If air is drawn into the opening, then your duct fan is functioning as designed (fancy term for OK.)

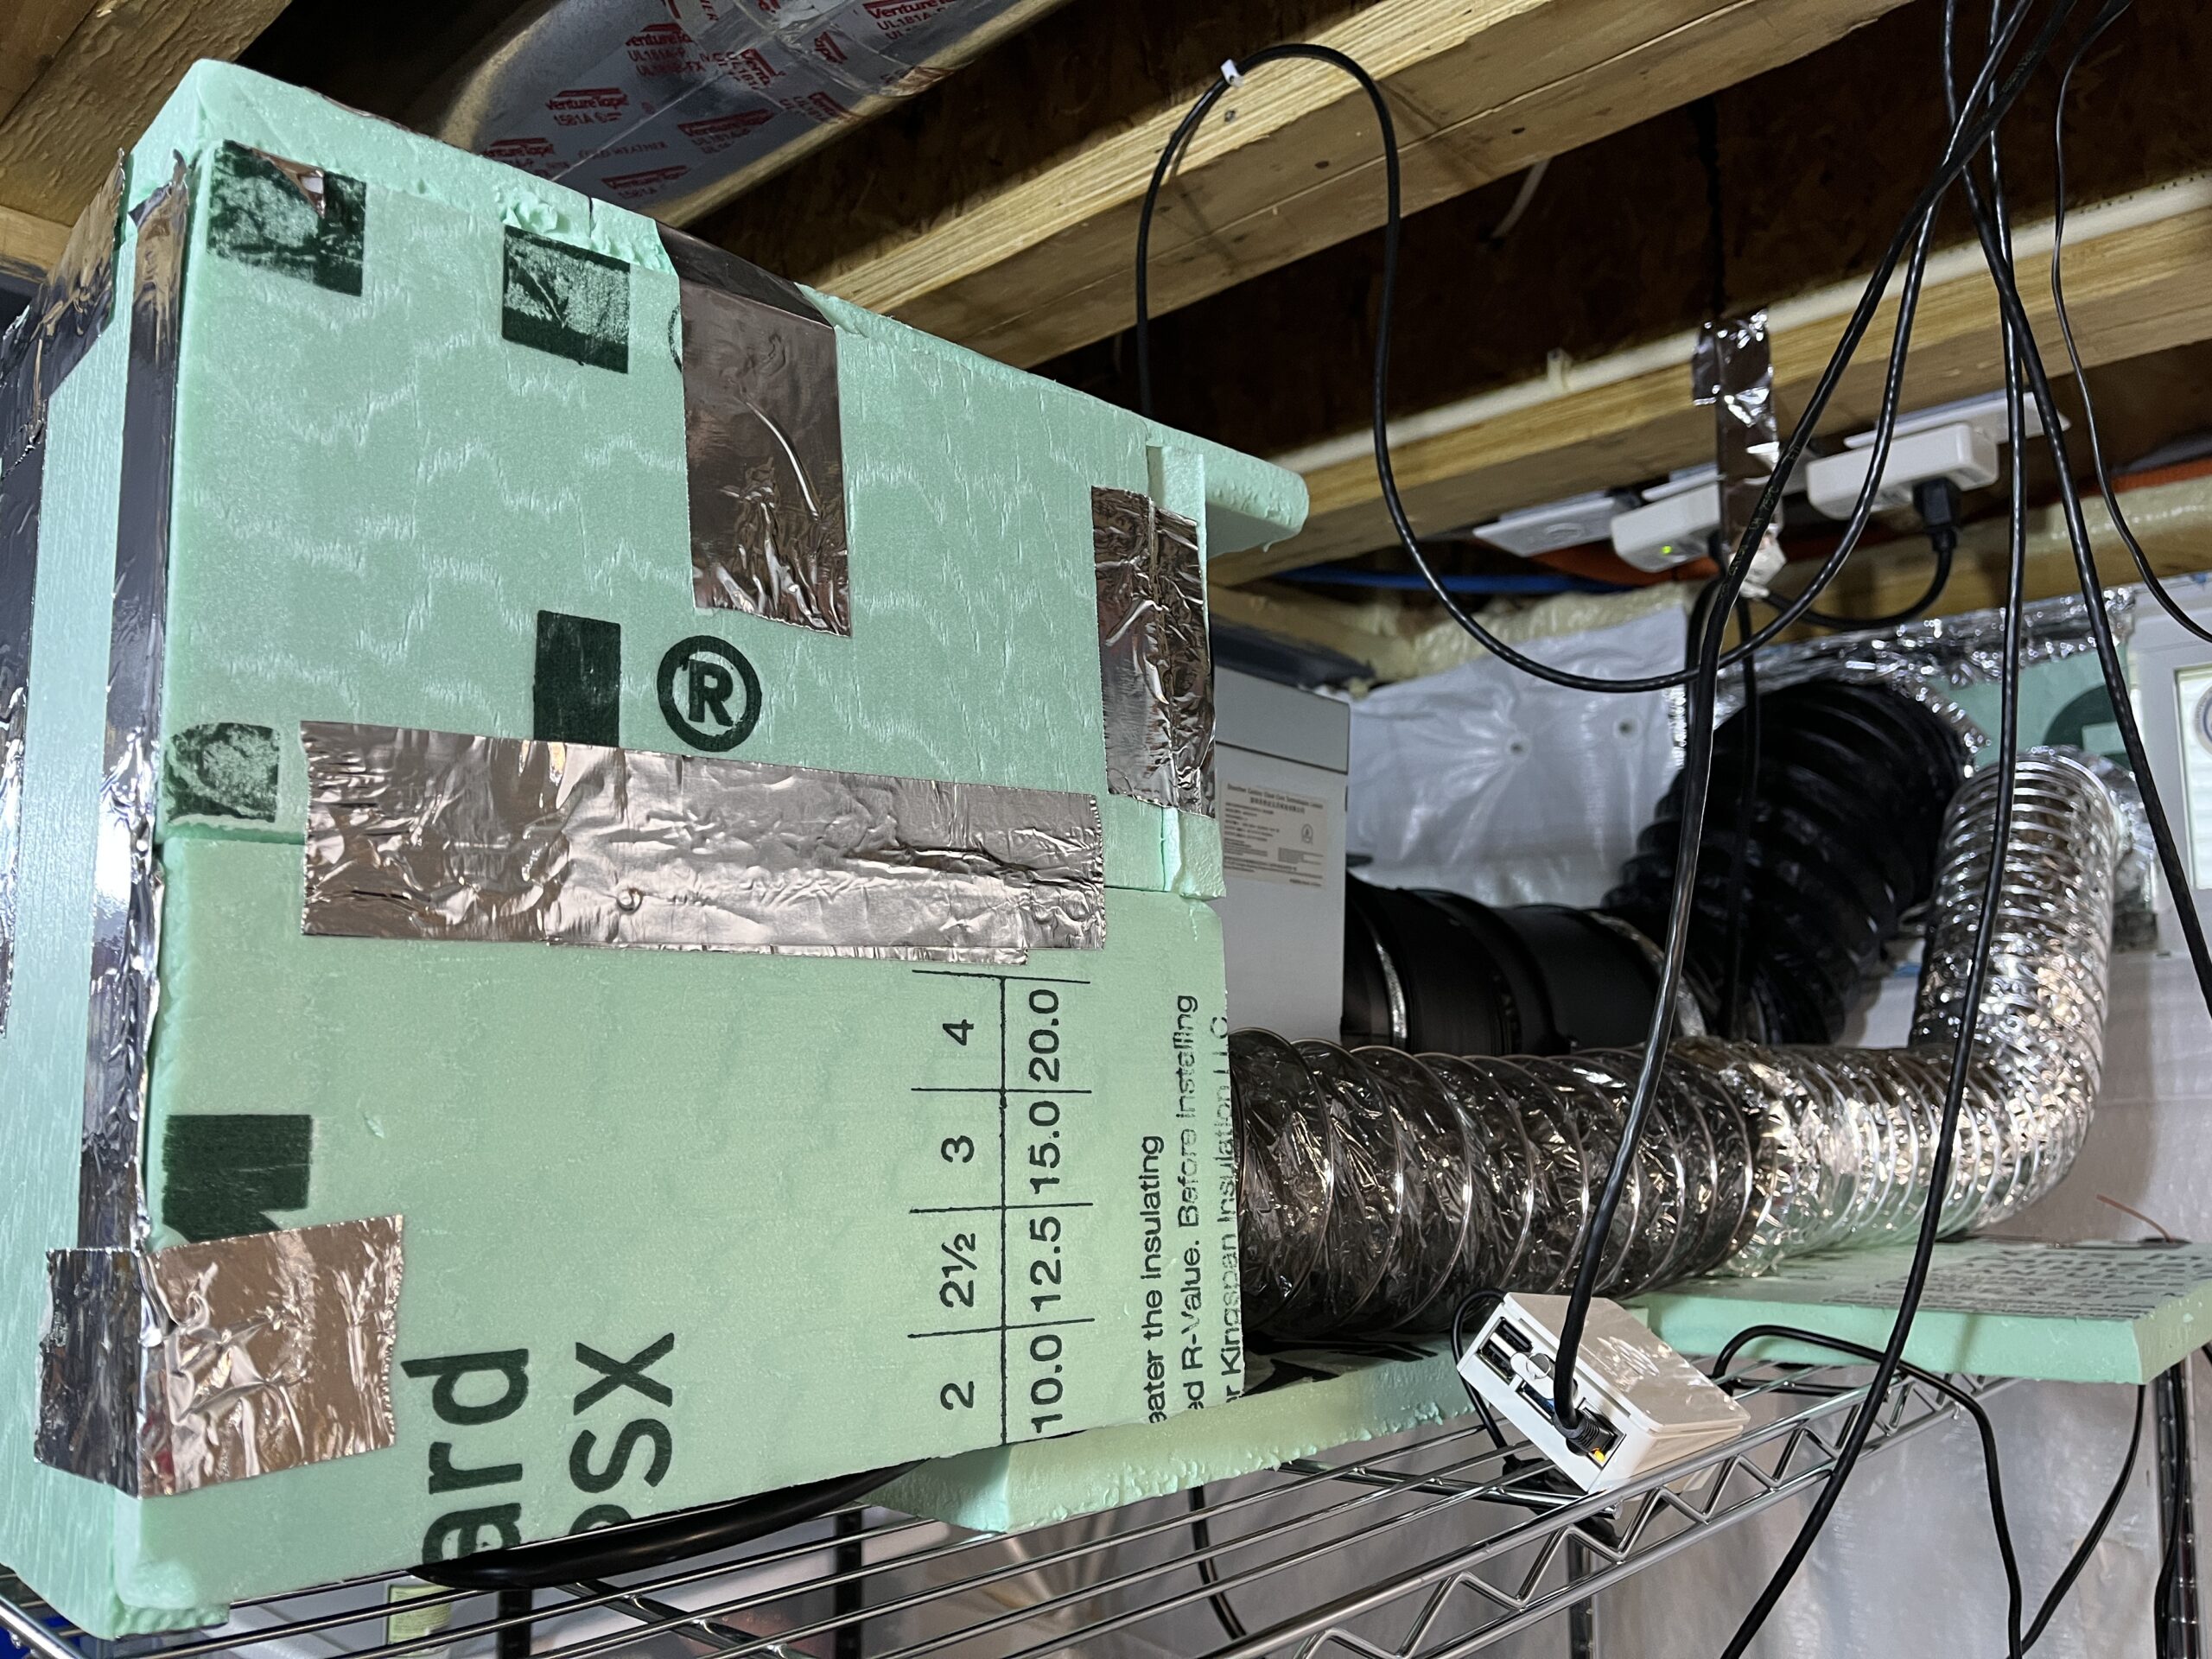
So next step, I bought an adjustable 735 CFM 8″ duct fan (https://amzn.to/3IVnXC5) and cranked it up around 80%/600 CFM (measured) and got an interesting result. Slowly the fans on the L7 started slowing down, all the way down to about 3200 RPM, which is where they’re sitting now after a few days. They bounce between 3200-3400 RPM, but most important the fan whine is gone and the duct fan isn’t any louder than the lower RPM Bitmain fans. Another quick point, the first duct fan I used was all metal, and the second was a polymer. I did several temp measurements at the exhaust, just before the duct fan (32C/90F @ 1 foot), and found that they were low enough to use a polymer fan (rated at 140F) without the fear of it melting or having any deformation.

Here’s the data from the L7 and it’s hashing around 9300 MH/s:

Output Fan RPM – 3180 – 3380 RPM

Output Temps (highest board 74C/72C)

73 dB @ 1 foot (measured)

Duct fan power usage – 136W (measured)

So a significant drop in dB, but most importantly once the fans got under ~4000 RPM the fan whine was all gone. If you know much about the dB scale, or even if you don’t, it’s logarithmic. What that means is that if something, like having a conversation with your cat Fluffy (if you’re into that), is measured at 60 dB, then turning on a vacuum will scare the cat. Why? Maybe old Fluffs hates vacuums, but maybe it’s the fact that a vacuum would be considered a factor of 10 times louder, scaring your feline friend. Now what about carrying your little Fluffer-nutter outside near a busy intersection? Well you’ll get the crap scratched out of you, probably because traffic is roughly 20 dB louder than your friendly conversation with Fluff-daddy, which equates to a noise 100 times greater than the secrets only you and your cat share.

So when I go from 81 dB to start, down to 73 dB, I’ve cut my basement hobby down from Grand Central Station to a white noise coming from below, maybe even fooling my wife into thinking I’m vacuuming! Trust me, mama will never get mad at you if she thinks you’re cleaning.

In summary, and what’s most important other than making $$$, happy wife happy life!

No cats were harmed in the making of this bloguverse post.

What’s my fans CFM and how do I measure it?

Part of managing your crypto miner is finding the perfect balance between performance, power usage, cooling, and noise. It’s not often easy, or even fair, how the balance works out. Often times I find myself sacrificing hashing power in favor of cooling and noise (happy wife happy life…)

So let’s talk about that, cooling and noise. Is there a way to pull this off and still keep a reasonably high level of hashing? Short answer, of course yes, long answer is still to come.

I did a little research into the actual air movement with respect to fan speed, and threw in some sound data (db @ 3″) for fun. I didn’t include temperature data because all hash boards and all systems running at all different voltage levels would just add too much confusion into the data (which may already be confusing enough!)

The test data was from a stock L3+, 4 hash boards running at 384 MHz (504 MH/s), using stock 6000 RPM fans, and I ran the fans from 20% speed to 100% speed (set in the firmware.) Each measurement I ran I took 3 different times after resetting the speed in the firmware. This gave slightly different results each time. One dataset was significantly different then I realized my measuring point was off for that set so I tossed it. The CFM was measured at one corner of the intake and exhaust where I saw the greatest volume. I measured the sound (db) at 3″ since I have other miners running and much further out from that it modified the experiment too much. 3″ allows us to track the trend of sounds with respect to fan speed, but won’t give you a relative db level to explain to your family why your basement/garage/shed/man cave is so loud.

Below are graphical reports of the data I collected. What I found most interesting was the actual CFM that I measured the fans at. As you can see the CFM drops off as the RPM drops off.

This is a basic and straight forward view, but to understand the relationship of CFM to RPM I normalized it versus 100 RPM. Basically this tells us that the relationship is directly proportional, i.e. speed up the fan 10% and you get 10% more CFM.

Now what about noise? While we all care about the last two graphs, mama and the family really only care about one thing, noise (two if you count money but I didn’t collect data on happiness versus profitability yet…)

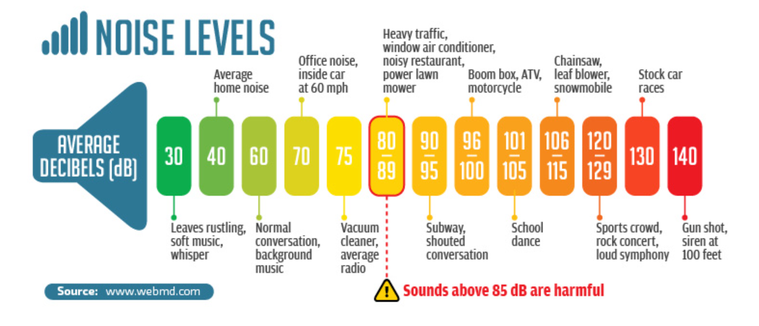
What the chart shows is that you have a significant drop in noise going from 6000 RPM (100%) to around ~3700 RPM (50%.) First off, I know 3700 isn’t 50% of 6000, but that’s up to Bitmain and how they wrote their firmware. But what it does tell me is that if I can tune my boards so that I only have to run around 3700 RPM then I’ve turned my indoor gas lawnmower into pleasant office noise (and minimized my chances at even more hearing loss.)

noiselevelchart

Also, one bonus chart, ever wonder how to relate fan speed % to RPM in the firmware, here’s what I came up with. While actual RPM did vary slightly, it didn’t seem to vary more than 1% each time I set at each specific fan speed percentage.

The big thing to remember as well, the speeds and CFM (not the db necessarily) are based off the fan manufacturer so these values are good on any miner that uses this stock 6000 RPM fan.

Hope y’all find this useful!

How many miners, how big of a miner, can I fit on a circuit?

More and more I’ve seen questions from folks about how many, or how big, of a miner can I fit on a circuit. This is a question that has many unknown variables that I plan on diving into below. Disclaimer – Please keep in mind this is my opinion and not an actual consultation for your mining business, so before you do any wiring or make any changes to your electrical system please consult a licensed electrician.

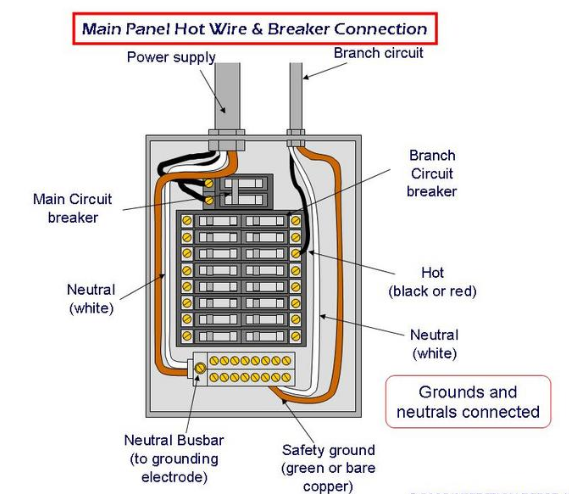
Now on to the good stuff. In order to answer the question how how many/how much we need to know a little more information; the basics of your panel, the basics of your circuits, the basics of the miner, and anything else you plan to operate. 

RESIDENTIAL/INDUSTRIAL CIRCUITS

For starters, each location in question needs to have a load calculation done to insure that you aren’t going to draw more than 80% of the maximum panel rating. As an example, if you have a dedicated 100A panel you can’t draw more than 80A continuous at any time. Since the mining world is in watts, let’s use Ohms law to break that down.

100A Panel @ 80% rule = 80A

Ohms Law tells us that Power = Current x Voltage

80A x 240V = 19,200W

So the key thing to keep in mind before planning out circuits is that you can’t have a continuous load more than 19,200W on this panel.

CIRCUIT/LOAD PLANNING

Now that we know the maximum wattage of our panel, we can use a little math to plan out what our circuits need to be. I’ll make the assumption that whatever miner we are using operates on 240V since that’s the industry standard at the power level they operate on.

There are 2 main amperage ratings for 240V breakers that are used in the mining world (yes I know there are more but these are the most common), 20A and 30A. There are several reasons for choosing one over the other, ranging from length of wire run, number of units per circuit, cost of wiring, and available breaker space. The most important thing to remember about each circuit is that they also have a maximum wattage rating:

20A Circuit @ 80% rule = 16A

16A x 240V = 3840W

30A Circuit @ 80% rule = 24A

24A x 240V = 5760W

MINING EQUIPMENT

So we know the maximum wattage our panel will hold, and we know the maximum wattage different types of circuits hold, only thing we are missing is what type of miner we’re running and what its power requirements are. 

Since this is February 2022 I’ll choose two scenarios, the first is using a newly released miner, the second is using a couple generations old miner. I’m partial to Bitmain products so I’ll look at the S19 or L7 for one scenario (~3250W) and the L3++ for the other (~900W, don’t hate on my S9 people!)

We know that our maximum panel wattage is 19,200W, so how many of each miner could we theoretically operate (I say theoretical since we have to split this up in to several circuits and the math may not work out perfect.)

S19/L7 = 3250W

19,200W / 3250W = 5.9

5 S19/L7 = 16,250W

So that leaves us with 2950W available in the panel for other electronics, fans, network equipment, etc.

L3++ = 900W

19,200W / 900W = 21.33

21 L3++ = 18,900W

So this leaves us with only 300W available in the panel for other electronics, fans, network equipment, etc. Of course this is only relevant if you plan on running everything for your operation off this one panel. 

FINAL CIRCUIT PLAN

Now that we know what our options are it’s more simple at this point, with a little math for the L3++ scenario.

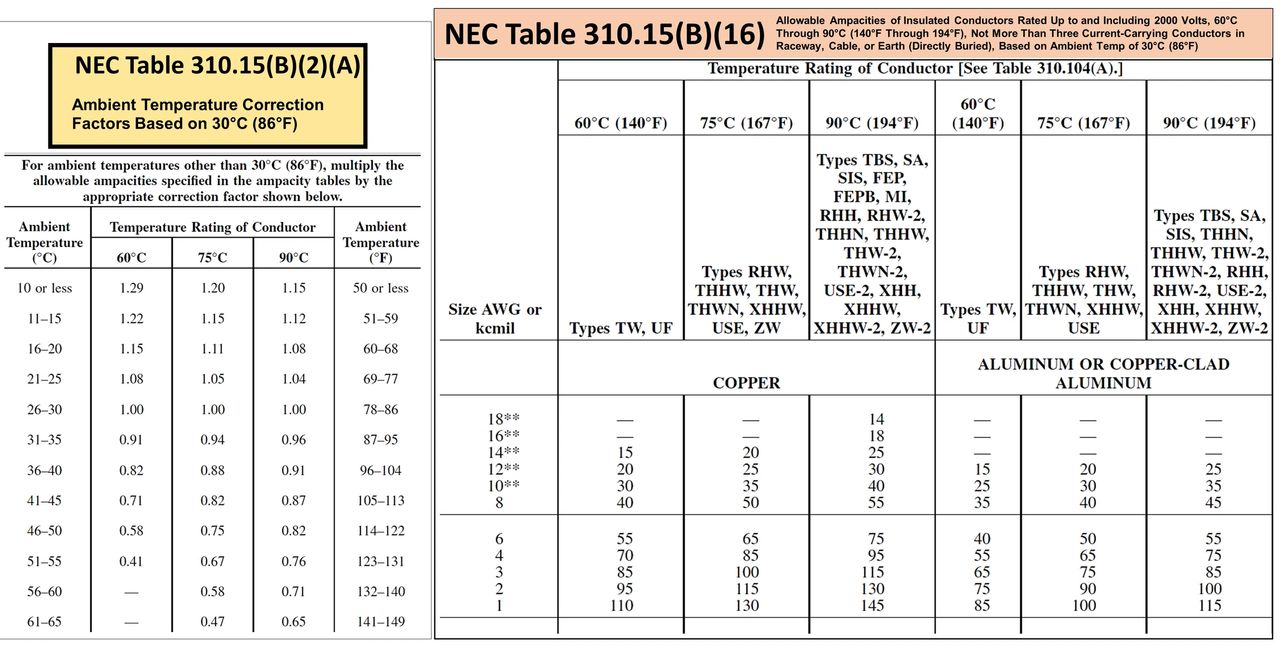
For the S19/L7 scenario it’s clear that we need 5 – 20A circuits, one circuit for each unit. This allows us to dedicate one circuit per unit and keeps us under the 80% rule for the full panel load (we are only using 16,250W which is only 68%.) Unfortunately you can’t fit two of them per 30A circuit like some other units (you’d need to be closer to 2800W to do this) but we have plenty of space in the 100A panel for 5 20A breakers. Keep in mind that 20A breakers will use 12ga wiring whereas stepping up to a 30A breaker requires 10ga wiring.

For the L3++ scenario we use a little math. We can put 4 units per 20A circuit (3600W) or 6 units per 30A circuit (5400W). To maximize the number of units, and keep it simple, we can also go with 5 – 20A breakers, 4 units for each circuit. This keeps us under the 80% rule for the full panel load (we are only using 18,000W which is only 75%.) Once again we will use 12ga wiring for this.

This was a quick down and dirty calculation and please know that there is more in depth planning that would go into an actual circuit design (like run lengths, ventilation, other equipment draw, main panel draw, etc.)

Maximize your circuits and minimize costs

To continue the journey into setting up your crypto miners, specifically the L3+, you should start considering a long term electrical plan. What I mean by this is how can you optimize your existing electrical circuits in your home, office, shed, or wherever to gain the most MH/s(AVG) per watt (W/MH) and overall the most MH/s(AVG) per circuit.

Update 12/27/21: I’ve had many folks ask how to measure their power draw. One solution that works very well is to install a Sense Energy Monitor on either your main electrical panel or a sub-panel that you have dedicated to your miners. This will give you real time feedback on the power (watts) used by your devices and make it easier come tax time to properly divide up your electrical bill and have the proof of the percentage you dedicate to your mining operation.

I’ll assume that all units will operate off 240V for this, as it’s generally considered the most efficient as you pass less current through the wiring than you would if you went the 120V route, which minimizes cost and power transmission loss.

After some testing of various operating power/efficiency levels (Overclocking on the L3+, is the juice worth the squeeze?) of the L3+, I’ve got a good data set that gives me an efficient range to operate the L3+ within. So what now, data, great, how do I put it to use?

I ran the tests at frequencies from 384MHz (stock) to 500MHz and each frequency I ran at 9.5VDC, 9.8VDC, and 9.92VDC. The most ideal setting (with the best W/MH) for overall hashing rate was 469MHz, giving us ~608MH/s(AVG) @ 1.54W/MH (935W total.) The most ideal setting for overall efficiency (W/MH) was 384MHz, giving us ~504MH/s(AVG) @ 1.4W/MH (695W total.) A midrange that balances the two was 450MHz, giving us ~576MH/s(AVG) @ 1.52W/MH (873W total.) We also have to add in the wattage for the control board and fans. I took some measurements with an ammeter and found that the control board was only drawing about 10W and the fans, albeit variable, will generally draw no more than their max rating which would be ~30W each.

Note: These are all numbers that have not had any type of auto-tuning done at the individual chip level so your actual numbers can vary depending on that process if you chose to do it. These are just baseline numbers to go off of.

For those that aren’t familiar with residential or commercial wiring, a quick note on how much to load the circuits. The National Electric Code (NEC) essentially requires that each circuit have the ability to carry 125% of the continuous load. So if we have a 20A circuit, that is our theoretical 125%, which puts the continuous load at 16A (16A x 125% = 20A.) Head math shows that 16A is 80% of 20A, hence the 80% rule. After we determine the size of the circuit (i.e. 20A) we then reference the NEC code to find the appropriate wiring gauge for the circuit. This is code for one very good reason, you don’t want to overload and heat a smaller gauge wire too much or you’ll burn it up, and burn down your structure. I’m sure many folks have seen this on the DC side with wiring from power supplies to either ASIC miners or GPUs. I’ve chosen to use 20A for most my setups, mainly due to cost of the wire (12 gauge wire is significantly cheaper than 10 gauge), but also the efficiency calculations you’ll see later on in this post.


So let’s get into the meat and potatoes of what this is all about. I’ve listed out the most common circuits you’ll find and created scenarios based off those.

20A/240V – Given the 80% rule we have 3840W available to support our L3+ units.

SPEED

L3+ @ 469MHz = 935W + 10W (control board) + 60W (fans) = 1005W total.

3840W / 1005W = 3.82, so basically we can only run 3 L3+ units with plenty of room to spare and we are getting 1,824MH/s(AVG) out of the 20A circuit.

As a side note, we can toss one more L3+ in there at the most efficient setting (see below for wattage calculation) and that puts us at a total of 3780W and 2,328MH/s(AVG).

EFFICIENCY

L3+ @ 384MHz = 695W + 10W (control board) + 60W (fans) = 765W total.

3840W / 765W = 5.02, so now we’re up to 5 units and we’re getting 2,520MH/s(AVG) out of the 20A circuit.

BALANCED

L3+ @ 450MHz = 873W + 10W (control board) + 60W (fans) = 943W total.3840W / 943W = 4.07, so now we’re at 4 units and we’re getting 2,304MH/s(AVG) out of the 20A circuit.

30A/240V – Given the 80% rule we have 5760W available to support our L3+ units.

SPEED

L3+ @ 469MHz = 935W + 10W (control board) + 60W (fans) = 1005W total.

5760W / 1005W = 5.73, so basically we can only run 5 L3+ units with plenty of room to spare and we are getting 3,040MH/s(AVG) out of the 30A circuit.

As a side note, we can toss one more L3+ in there at the most efficient setting and that puts us just over the 30A circuit at 5790W. Promise me you’ll unplug one intake fan (-30W) and that would give us 3,544MH/s(AVG).

EFFICIENCY

L3+ @ 384MHz = 695W + 10W (control board) + 60W (fans) = 765W total.

5760W / 765W = 7.52, so now we’re up to 7 units and we’re getting 4,032MH/s(AVG) out of the 30A circuit.

BALANCED

L3+ @ 450MHz = 873W + 10W (control board) + 60W (fans) = 943W total.

5760W / 943W = 6.11, so now we’re at 6 units and we’re getting 3,456MH/s(AVG) out of the 30A circuit.

50A/240V – Did you disconnect your AC or hot tub for these miners or something?

You probably are spending more money in wiring (code says you’ll need 6 gauge wiring) then you can make on this circuit in a week. With the wiring and conduit, you’ll spend close to $5 per foot. In other words, stick with 20A (12 gauge wire) or 30A (10 gauge wire), the wiring is available at your local Lowes or Home Depot and comes in Romex so it’s an easier install without needing conduit. That’s all I have on this.


In summary, efficiency is king. Running out units at 384MHz and 9.5V yields us more than an 8% gain in MH/s(AVG) in a 20A circuit and a 14% gain in MH/s(AVG) in a 30A circuit.

Individual results may vary, take it for what it’s worth, but if you have the units, keep them running efficiently and you’ll get the most bang for your buck!